Millie: Week 23

I hope you enjoy these weekly updates as I learn to navigate through the business of flipping houses.  This flip, Millie is the most challenging and most exciting yet! You can find more about this house and about my 3 previous flip houses here. Yep, we got a few inches of snow.  Just a few.  I won't dwell since I chose to live in this area.  Winters are a necessary evil to get to enjoy the other 3 seasons, but it's still annoying.

millie-w23-snow-1

In the next few days, I will also have to dig some snow out of the dumpster so I can use it for, ya know, trash.  I plan to bail it out with a bucket like I'm in a sinking ship.  It'll be a great photo opp if you're interested.

When I wasn't snowed in and being prevented from working or actually shoveling the darn snow itself, a little bit of work did get done this week.

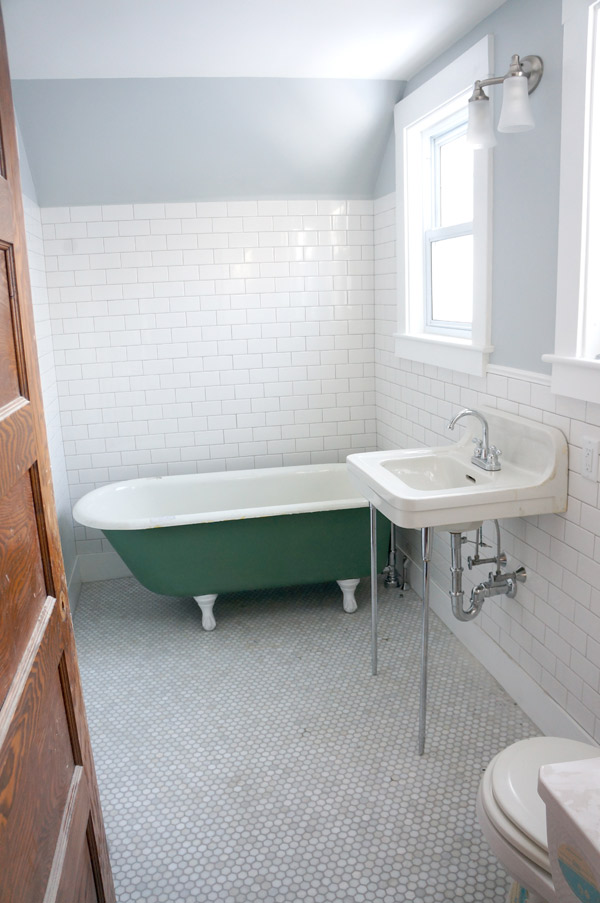
Most notably, the upstairs bathroom is taunting me.

millie-w23-bathroom

Beautiful plumbing fixtures, seemingly hooked up, with no water to them.  Whomp whomp.  Guess I'll be waiting a bit longer for a usable toilet.

Seriously, though, once I get a shower curtain and a mirror up there?  Wowza.  She's gonna knock your pants off (quite literally since it's, ya know, a bathroom......).  With the wall-hung sink and the plethora of tile, this room feels quite spacious.  Mission accomplished.  Before?  Not so spacious and blindingly blue.

Millie-bathroom-1

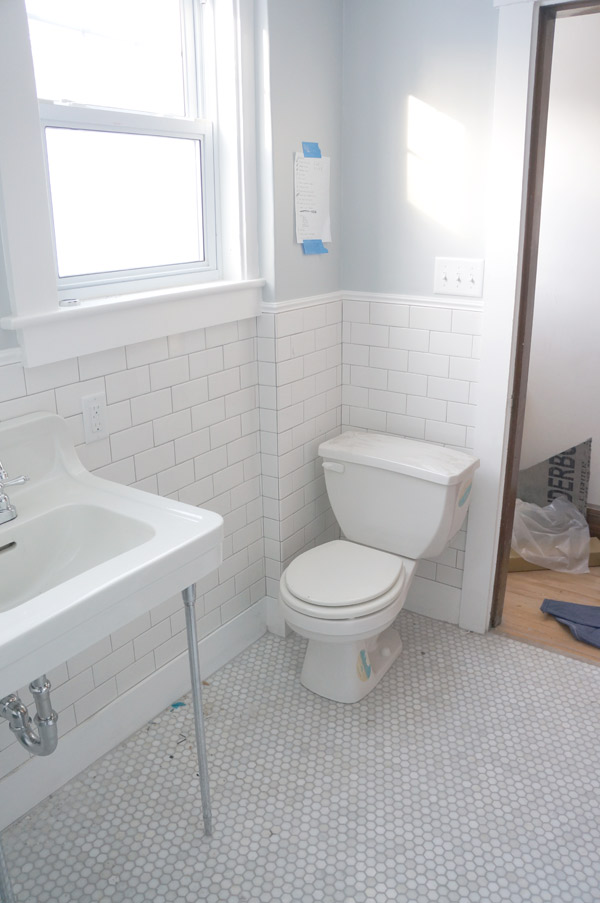
Way back when I was still tackling the yard, I picked up a free, side of the road, unused toilet.  (Who DOES that?!)  That's what ended up in here due to its petite scale.  In an ideal world, the toilet would have been moved across the room into the alcove, but in that ideal world, I would have had to cut through almost every floor joist in the room, completely restructured it so the bathroom didn't fall onto the floor below, and sacrificed the pristine canvas ceiling in the master bedroom below.  Not so ideal.  So the toilet stayed in it's weird little spot, just with a smaller tank.

millie-w23-toilet

Stop taunting me, Toilet!

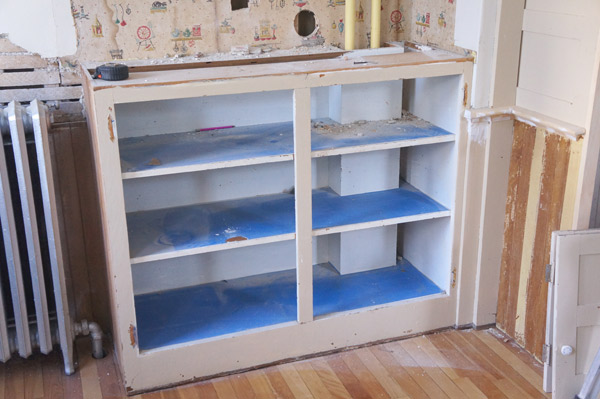
My white whale this week, was actually a cabinet.   I did conquer it in the end.  The last cabinet in the kitchen that I planned to modify for the modern world.

millie-w23-cabinet-before

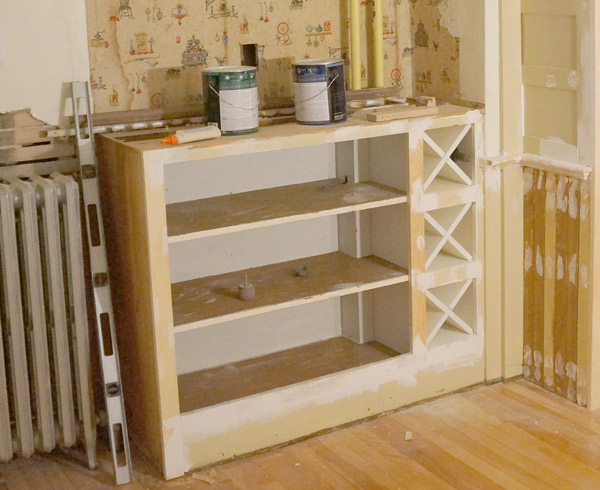
Even though it's the sole remaining cabinet from the 60s (all the other remaining are original and 100+ years old), it was built in nicely around plumbing and at the same height as the radiator.  He earned his right to stay.  The old slab, dating 60s doors found their way into the dumpster a long time ago.  I decided to use 100 year old doors that I removed from the now-refridgerator cabinet and add a wine rack.

I guess you could say this is what separates me from your generic house flipper- I don't always ask, what's the cheapest and quickest fix, sometimes I realize that an unexpected special element can take a room to the next level.  Either that or I'm crazy and I like making more work for myself.  One of the two.

millie-w23-cabinet

The 100 year old doors need to be squared up a bit before getting installed since they've gotten a bit off kilter in their old age.

The very positive side to the snow day this week is that Hubby and I were able to sit down and take an in depth look at this flip's budget.  Surprisingly, we're doing rather well.  So well, in fact, that I have room in the budget to pay someone to finish hauling the remaining plaster and lathe out of the basement for me AND to hire a painter for hopefully the upstairs and stairwells.  Huge weight off my shoulders.

Fingers crossed that there aren't any more blizzards in the near future!

Snowed in Staging with Chairish

Ah snow days.  The rush to get things done before the snow starts, then the inevitable cleanup and catch up afterwards.  Over at Millie, I've got record amounts of snow to shovel.  Literally.  Yesterday's 33.5" apparently beat the old record by .5"  Luckily, Millie has super amazing neighbors who cleared the front sidewalk for me. Even though there's still quite a bit of work left to do (understatement of the year) before I can list Millie the fliphouse, my mind has already shifted to staging.  I don't want it to sneak up on me at the end and then run out of time to stage it properly.  She deserves better than that.  So when Chairish asked me to put together a styleboard using one of their latest rugs, it was right down my alley.

If you aren't familiar with Chairish, it's an online consignment shop for awesome furniture and decor.  Doesn't sound like anything I'd enjoy, right?

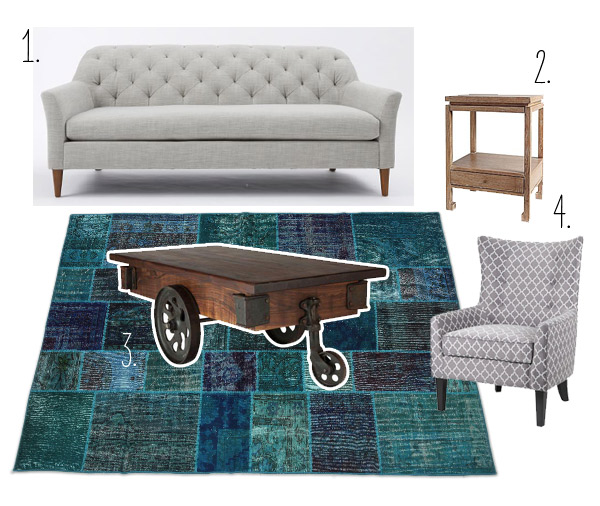
Today I was in the mood for a bit of rustic glamour and chose this Turquoise Overdyed Turkish rug to base my design off of.  I started simple with a few staple pieces:

chairish-rug-funiture-plan

1.  West Elm, Ainslie Sofa

2.  Serena & Lily, Reese Side Table

3.  Chairish, The Foundry Factory Cart

4.  Target, Carissa Shelter Wing Chair

The fun really comes into this room once you start adding accessories.  I wanted to balance out the rusticity of the wood and patchwork with some sophisticated metallics.

chairish-rug-accessories

1.  Target, Nate Berkus Geo Printed Resin Tray

2.  Anthropologie, Arca Jewelry Boxes

3.  West Elm, Moorish Tile Printed Curtain

4.  Rejuvination, Merchant Floor Lamp

5.  Anthropologie, Ink Drop Pillow

6.  Tonic Living, Handcut Shapes, Rain Pillow

7.  West Elm, Beaded Corners Pillow Cover


Now I'm itching even more to get to staging!  Have I inspired you too?  Check out their other available rugs for more inspiration.


Millie: Week 22

I hope you enjoy these weekly updates as I learn to navigate through the business of flipping houses.  This flip, Millie is the most challenging and most exciting yet! You can find more about this house and about my 3 previous flip houses here. Not sure if its evident to you guys, but I'm finally feeling the momentum of this flip!  The momentum that makes me dance while I'm building something because I can see things happening.  It took me so long to get here because I spent over half the past few months doing yard work and demo.  Now I know what to hire out next time #amiright??

You may have seen on instagram yesterday: LIGHT!  Only in one room because it's the only one that I've painted, but I can not express to you the excitement to have a light switch installed and one that actually WORKS!  Yes, very minor win, but it's a huge step in the right direction!

millie-w22-light

No plumbing yet, sadly due to unforeseen circumstances on the plumbers end.  He may get started today, but has assured me I will definitely be seeing him-and a functional toilet- Monday.  But along with bathroom lights, and a fan (I just need to get the right bulbs), there's also a working power outlet!  Up until now, the upstairs power has come from an extension cord from the kitchen.

millie-w22-gfi

I also sent my contractors up to the attic this week.  Way back in the first weeks, I had to tear out the floor that was in there originally so that my electrician could get to all the wiring.  It was a fun task....

millie-w22-attic-before

And since the attic is a walk-up, it needed to be at least usable for storage since there's not enough head room for anything else.  After I added some more insulation in the areas it was lacking (and subsequently itched for the next 3 days), my contractors installed a sturdy plywood floor.

millie-w22-attic

I wish my own attic was this useful!

Ok, so now I've mentioned what the electrician and contractors did this week, but what occupied my time?  A lot of little things and a few big.  Little such as finishing the bathroom floor grout, scraping ancient yellowed window film off a few windows, the aforementioned attic insulation, and bringing loads of trash out to the dumpster.  A few big things that I got started with are all in the kitchen.  Ah, the kitchen.  I've been waiting so long to dig my hands in there!!

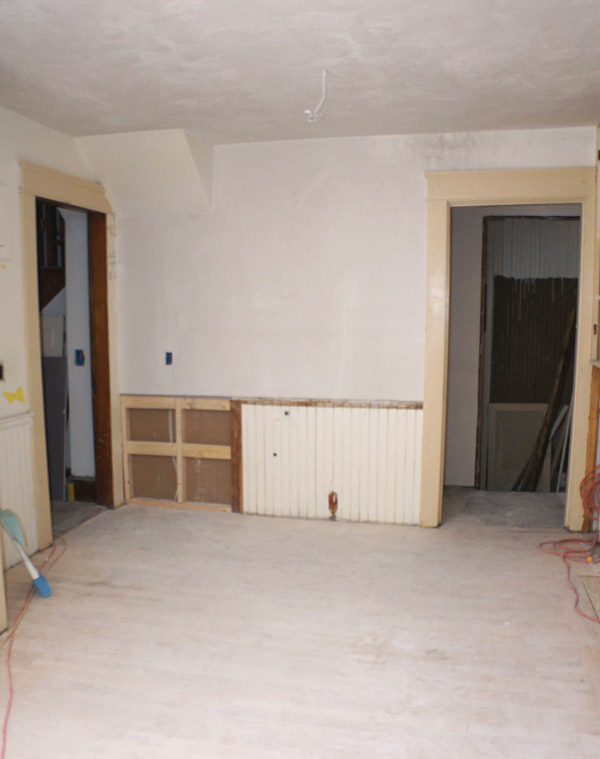
When last we visited the kitchen....

millie-w18-kitchen-walls

and now, while it's not a drastic difference, a difference it is!

millie-w22-kitchen-wall

I salvaged beadboard from behind where the cabinets will go in order to patch here.  I also installed a new 2 piece chair rail.  A little patch and caulk and this puppy is ready for paint!

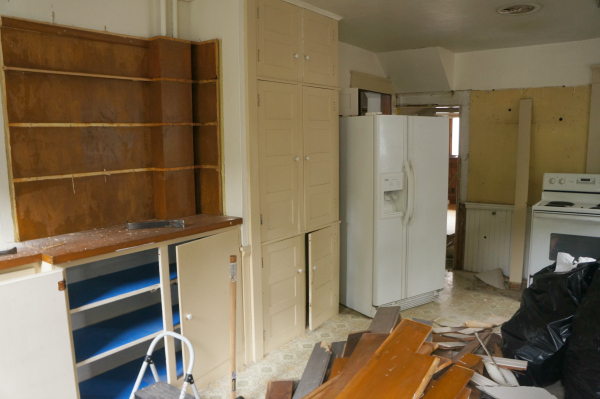
I also have been putting the puzzle pieces together of what will be the fridge enclosure.  Here's a reminder of the past, right after demo started:

Millie w5 kitchen

and after a bit more demo:

millie-w8-kitchen-2

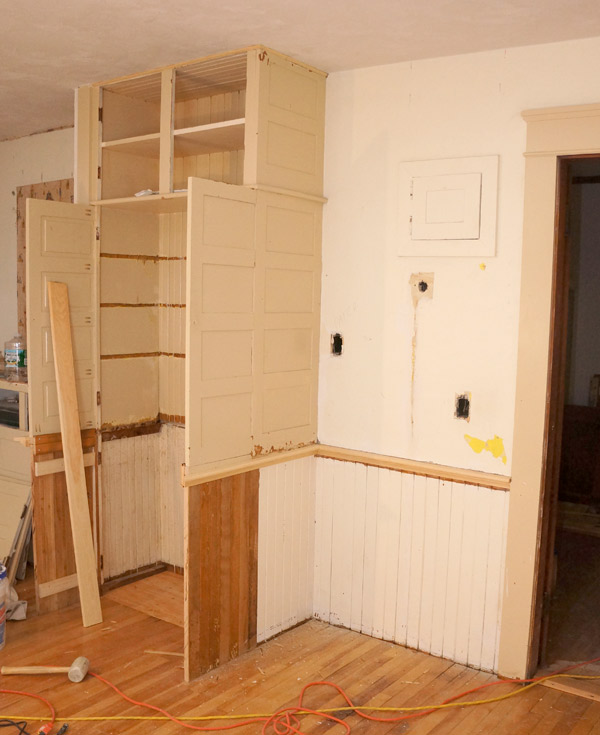
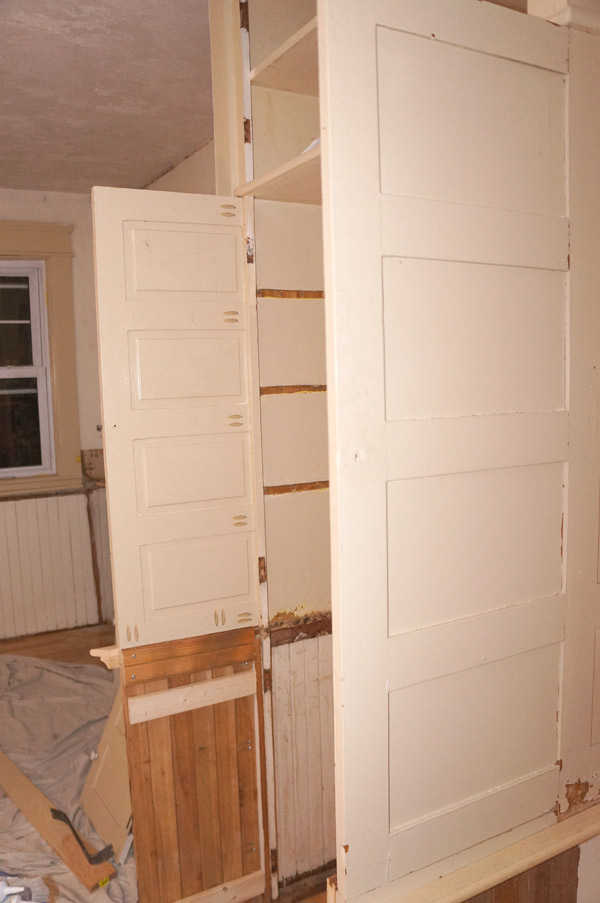
While I would have preferred not to muck with the original cabinets at all, having the fridge float out in the open like it was when I bought the place just wasn't going to cut it.  Sacrificing this cabinet and modifying it was the logical option to make the kitchen look purposeful.

millie-w22-fridge-cab-1

Using the doors removed from the front, more salvaged beadboard, and a new chair rail, with a coat (or 3) of paint, this build-out will look like it was always supposed to be here.

millie-w22-fridge-cab-3

I'll admit to you, the inside is going to look a bit rough, but it did already.  I used my kreg jig and salvaged wood from elsewhere in the house to support the extension.  The fridge will be hanging out here, so no one will be looking at the inside anyway.

millie-w22-fridge-cab-2

And since I love to over share, here's what it's currently looking like from the other side of the room, mess and all.  The original cabinet doors will be going back on top of the fridge build-out.  It made more sense to me just to build out the bottom and not the entire cabinet, but I'll spare you the long-winded thought process.

millie-w22-fridge-cab-4

Today my little enclosure will get a top as well as front trim pieces that will perfectly frame out the fridge that I've ordered.  Oh, she's going to be so pretty.

To the best of my knowledge, cabinets are still slated to be delivered a week from yesterday- fingers crossed!  That means I'll be doin' the hustle in here so we can install them right away.  Just think, by next week's update, I might have a working toilet, a painted kitchen, repaired cabinets, AND if I dare to dream, maybe even overhead lights!

Have a great weekend!