Fly Away

This past weekend, I had the joy of being asked to do a DIY demo at my local Habitat for Humanity ReStore's "Fall for All" event.  As soon as they asked, I had a spark of an idea.  I've been wanting to try my hand at some 3d cut paper butterfly art for my future niece's nursery and the event would be a perfect practice.  For all those visiting because we met at the ReStore, WELCOME! DIY cut 3d butterfly art via Year of Serendipity

I swear, it is so much easier than it looks!  I was able to put one together in 2 hours at my Demo table at the ReStore.  All it takes is a frame, some paper, and some exacto knife skills.

After my demo, I recreated the art for my soon-to-be niece's room.  I started with an empty frame from, you guessed it, the ReStore, a piece of thick watercolor paper, a piece of thick chip board or thin cardboard for the backing, and one curious kitten.  (no kittens were harmed in the making of this art)

DIY cut 3d butterfly art supplies via Year of Serendipity

After cutting the 2 pieces to fit within the frame, it was time to get messy!  I chose to layer some rice paper onto the backing with Mod Podge to add a pop of color to the background.  Painting the backing piece would have the same effect, but I had some rice paper on hand and an idea in my head.  Don't you worry, it'll dry clear!

DIY cut 3d butterfly art backer via Year of Serendipity

Once you have the backing covered, set that aside to dry for a while.  Now on to the butterflies!!

The prep step that I'm not showing you was figuring out a few butterfly shapes.  They could totally be drawn freehand, but I thought it would be easier to create a template.  Using a scrap of paper folded in half, I played around with butterfly shapes and sizes until I had 8 of varied sized that I thought could work.  I traced them onto scrap cardboard from the recycle bin and cut the butterflies out with an exacto.  Thus a template was born!  If you ask really nicely, maybe I'll scan it in and make a printable template available.

DIY cut 3d butterfly art process via Year of Serendipity

Next, on your watercolor paper, figure out a flight path for your butterflies.  I decided I wanted to start small in the corner and fan them out at the top.  I drew to guide lines for the general shape planned, then started tracing butterflies willy nilly.  Go crazy!  Fill up your paper!

DIY cut 3d butterfly art process via Year of Serendipity

Just make sure to leave about a half inch around the outside for your frame and don't allow your butterflies to touch or overlap.  While tracing my templates, I made sure to leave a space between the 2 halves of the butterfly.  This is an important step when you're cutting since you want to leave a gap where the butterfly body would normally be.  I tried to bump up the contrast on this one so you could see my light handed butterflies, but the color got a bit wonky.

DIY cut 3d butterfly art process via Year of Serendipity

Once you have your butterflies all drawn out, break out an exacto knife with a new, sharp blade.  Sharp blades make cutting much easier, so I'd be sure have a few on hand.  This part is not as challenging as it looks, I promise!

DIY cut 3d butterfly art process via Year of Serendipity

Go slow, be careful, rotate your paper as necessary to get the best angle, and make sure to leave a gap between each butterfly's wings.  This 'body gap' is what allows you to fold out the wings.  The best part about this is you don't have to be exact!  If you don't follow your lines precisely, it doesn't matter, as long as it still resembles a butterfly wing.

DIY cut 3d butterfly art process via Year of Serendipity

Be prepared to spend a bit of time on this step- although it doesn't take hours, its the longest part of the process.

After all of your butterflies have been cut, you have 2 options: take an eraser and erase all of your pencil lines or flip your paper over and use the back as the front.  I chose to erase since I had some patches on the back where I overcut a few of my fliers (oops).  If taking the erasing route, I recommend holding down the wings as you erase so they don't get crunched up by an overzealous eraser.

DIY cut 3d butterfly art process via Year of Serendipity

Now it's time to make them fly!  Carefully peel up each wing and crease it at the body.

DIY cut 3d butterfly art process via Year of Serendipity

Repeat until all your wings are taking flight.

DIY cut 3d butterfly art via Year of Serendipity

Bring back your backer piece which should be totally dry by this point.  I decided to use Mod Podge again to adhere my butterflies to the backing.  Spread a THIN layer, wait for a few moments until its a bit tacky and not totally wet, and carefully place your cut paper over the backing.  If the glue is too wet, it'll warp your paper... trust me, I've learned from experience...

DIY cut 3d butterfly art backer via Year of Serendipity

Once aligned, run your finger between the butterflies to make sure that the negative space sticks down and your wings stay flying free.

DIY cut 3d butterfly art process via Year of Serendipity

While it's drying, you can take this opportunity to put it in the frame (make sure if you're using a frame that has glass in it, remove the glass since it will just flatten your flying friends).  Since I was using an empty frame, I used framing points to hold the art in the frame.

All that's left is to hang and admire!

DIY cut 3d butterfly art via Year of Serendipity

DIY cut 3d butterfly art via Year of Serendipity

It even earned the kitten stamp of approval (which naturally is indifference, but I'll take it!)

DIY cut 3d butterfly art via Year of Serendipity

What I love about this project is that it's so customizable.  Want to make it smaller or bigger?  No problem!  Want to make your butterflies into a letter?  Go for it!  Whatever way you want, they butterflies will be dynamic and playful, but still the right amount of elegance.

So, what do you think?  The perfect addition to a little girl's nursery?

Millie: Week 5

I hope you enjoy these weekly updates as I learn to navigate through the business of flipping houses.  This flip, Millie is the most challenging and most exciting yet! You can find more about this house and about my 3 previous flip houses here. Week 5 is apparently where I start to get anxious about how little work has gotten done in the interior.  Let's get husslin!

I spent a little bit more than half of the week this week loading yard waste strategically into a dumpster.  I believe I have now achieved the status of dumpster tetris master jedi.  The dumpster was essentially full after the first day and I only had half the yard waste in so I had to be very strategic.  By the time the dumpster got picked up, I doubt I could have fit a single stick more.  I received this text after my dumpster got picked up.  Just look at that corner definition- that's talent if I ever saw it.

dumpster jedi

image courtesy of Joshua, I'll Take That Junk

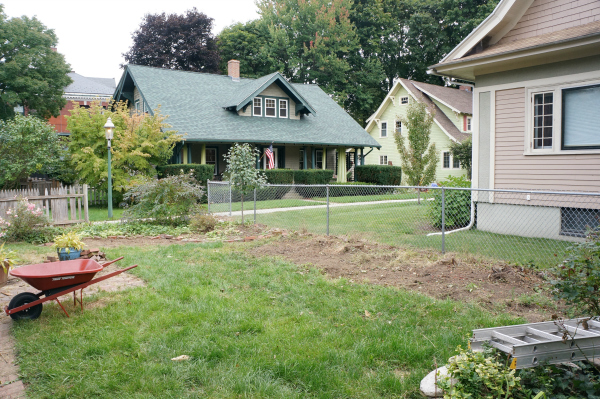
But that means that the yard is finally clear! (disclaimer: I do mean clear of yard waste... construction debris and demo is a different story, however)  Now we can finally get to the 22 stumps that need grinding down.

Millie w5 back yard 2

Considering where we started from, this is pretty remarkable.  The 2 below are taken from almost the same spot, although you'd never be able to tell.

Millie-Ext-10

Millie w5 back yard 3

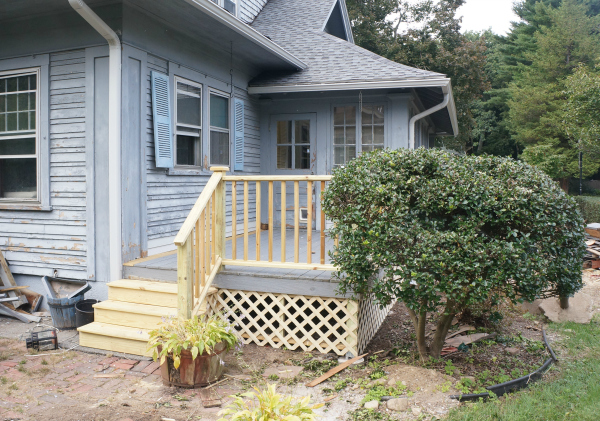
Around the side, the porch is just about finished with it's spruce up, the holly got a delightful haircut, and the contractor has moved to the front porch.

Millie w5 back porch

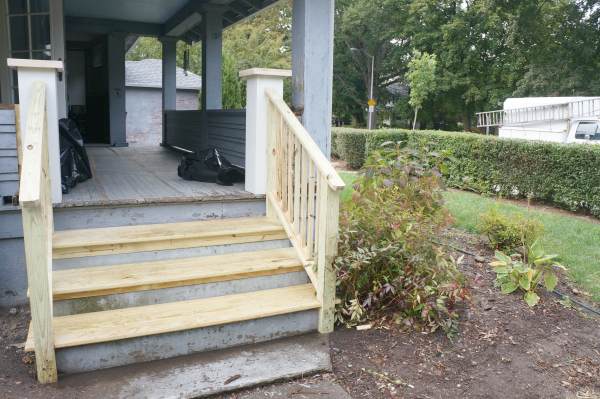
Trying to figure out a way to make the new railings tie into the old porch was a bit of a challenge, but once these are finished, have trim and are painted, I doubt anyone will think twice.

Millie w5 front porch

And look!  Some grass is actually starting to grow!!

Millie w5 grass

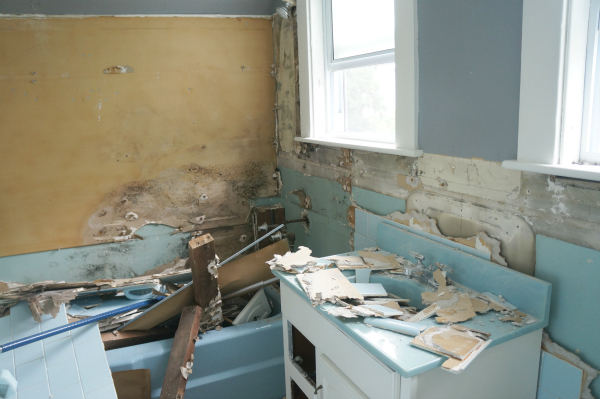
While the contractor was busy on the porches, the electrician was busy working on the knob and tube, and the painter was busy power washing, I kept myself busy making messes.  Smashy smashy time!

Millie w5 bathroom

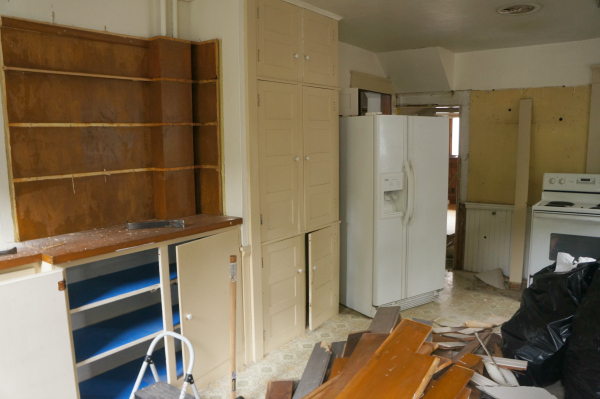
Methinks I'll be needing a demo dumpster next week.  Luckily for me, the demo isn't the entire house- just the bathroom, partial kitchen, attic floor, and the future master closet.

Millie w5 kitchen

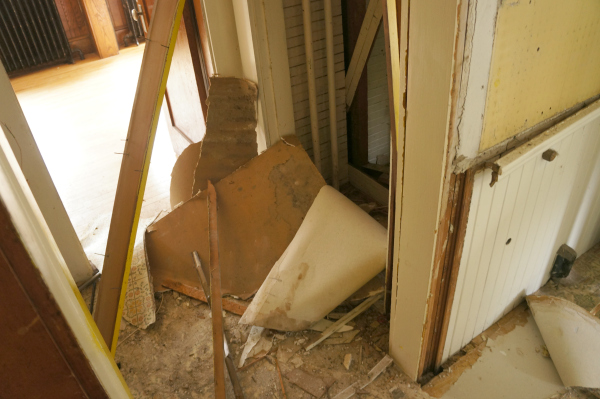
I have a pretty good motivation to get this demo done fast so that my plumber can get started.  Every time the toilet flushes upstairs (in the blue rubble pile), it drips into the future master closet just outside the kitchen (I need a shower just thinking about it).

Millie w5 future closet

There's good and bad news in regards to the kitchen/closet floors though.  I think I mentioned last week that I was pretty sure there were hard woods lurking under.  There are!....... however, as I peeled back the layers of linoleum, under 2 layers of linoleum and a layer of plywood and on top of the wood floors, I came across what is most likely asbestos tile... big boooo.  I've left a few messages for asbestos removal places so we'll see what the quotes say.

And now that I'm starting to think about the interior, more craigslisting has begun!  You already know about the tub in the sunroom, but I also purchased a sink for the upstairs bathroom.  It looks rather unassuming now, but it actually has dainty chrome legs and when I fancy it up with a nice gooseneck faucet- she'd gonna be a looker! (Hubby and just about everyone else is skeptical.  Trust my vision people, I can see it now!)

Millie w5 sink

I've also received a little bit of history from one of the neighbors.  According to a report from 2008, this house was actually built in 1914, NOT 1902 as records state.  It was built by Fred E. Richardson who built all the bungalows in the little 'walkable community' as the report calls it, and first owned by John Otis Hale.  With every tidbit of knowledge I gain about the house, I want to know more!

Now that the ball is steadily rolling both inside and out, let's hope it gains momentum!

Concrete Bandwagon

All aboard for the Concrete surface Bandwagon! If you aren't a big diy blog reader, you probably have approximately zero idea what I'm talking about, so allow me to explain.  I am now the proud owner of a 10lb bag of Ardex Feather Finish, and I can not wait to give it a try!!!!!  Introduced to the DIY blog land by Kara Paslay, Ardex Feather Finish is like frosting for your countertop.  Essentially it allows you to create the look of a polished concrete surface by simply covering up your old surface.  No demo of your old countertops, no pouring messy concrete into makeshift forms- only a thin coating of concrete that result in pretty surfaces that look substantial, textured, and just all around awesome.

lgn concrete counter

via Little Green Notebook

I've been dying to find a project to try this out on and I've finally found it!  I'm going to make you wait until probably next Wednesday or maybe even the following Monday to tell you cuz I'm mean like that, but I will tell you it's not my countertop, or Millie's countertop, or a floor, or a table..... You'll just have to wait and see!

Until I perfect my hand at the Ardex amazingness, I'll show you a few of the projects that lured me to the dark side into wanting to try it.

1. I have to start with Kara Paslay.  Not only is she pretty much the one that started it all with this countertop redo,

Kara Paslay Ardex Counter

but she's also used Ardex for just about everything- like creating this pretty sweet patterned table top.

Kara Paslay Ardex Table

2. John and Sherry jumped on the bandwagon not all that long ago by DIYing the countertops in their latest home.  It's not their long term solution since they have hopes for an eventual full kitchen renovation, but it's worlds better from where the kitchen started!

YHL concrete counters

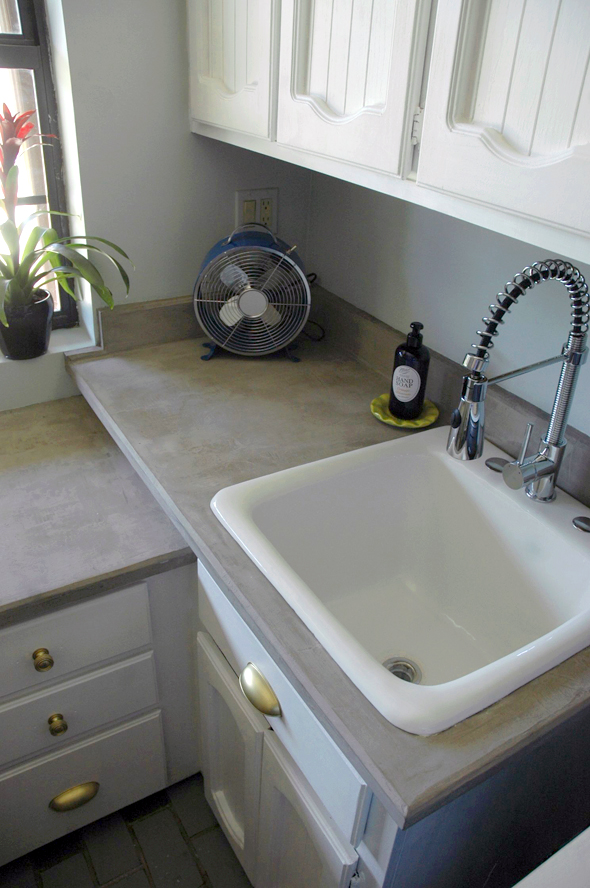
3. Jenny's laundry room on Little Green Notebook is my personal favorite for several reasons.  First of all, I love the concrete look as part of the whole room composition- so successful!  Second of all, I'm insanely jealous over pretty laundry rooms since my own is a corner of my unfinishable 100 year old basement... and lastly..... gold hardware.  I'm a sucker.

lgn laundry room ardex

What I really love about all these projects is that the Ardex looks like it belongs.  It doesn't look like one of those countertop refinishing kits that just makes your laminate look a little bit less bad (I'll be ripping one of those out very shortly at Millie).  These just show that DIY doesn't always have to look it.

I can't wait to start my own Ardex project!  It's. going. to. be. epic.... ok, maybe a little bit of an oversell, but still, I can just picture the end result and it'll be happy-dance-inducing at the very least!