Modern, Funky, Glam

Do you ever start a room and then just get stuck on how to complete it or make it really shine?  This is such a common problem- you are not alone!  That's why I'm here to help! Lauren reached out to me for a bit of help on her new living room.  She had a great start, getting a new coffee table, sofa, and rugs, but then froze not knowing what to do next or how to make the pieces that she loved all work in harmony.  Gray sofa, neutral walls, & neutral but textural rugs... we're off to a great start!

lauren-lr-before

lauren-lr-before2

While the current space doesn't show it, Lauren is certainly not afraid of color or pattern, so I decided to make it my mission to help her realize the modern, funky, glam space that I could tell that she was going for (even if she hadn't realized that's what she was going for yet ;-) ).

I started by pulling together an inspiration board.  My plan would begin with moody neutrals and I would layer on metallics, pattern, and a few bold elements.

modern funky glam living room inspiration board - via Year of Serendipity

inspiration: My Domaine, Domino, Hunted Interior, Urban Outfitters, original source unknown

From there I started to look at the individual pieces.  Lauren's gray velvet sofa was staying and the hopes was for the other, slipcovered one to be replaced by 2 side chairs.  The sofa has good bones, but I would remove all of it's matching pillows, start fresh and inject some funky glamour in the space.

modern funky glam design plan- via Year of Serendipity

1. oversize abstract art- buy larger and frame partial //2. brass task lamp //3. sofa (sim to existing) //4. locust throw blanket //5. campaign accent table //6. gray linen-like curtains- wall to wall //7. kilim pillow //8. metallic pillow //9. kilim pillow //10. swoop arm side chair //11. coffee table (sim to existing) //12. natural fiber rug (sim to existing) //13. faux fur rug (sim to existing)

I might even throw a fiddle leaf fig tree in the corner near the TV for a bit of greenery too.  I'm dreading the day that fiddle leaf figs go out of style.  They're such a fun, graphic way to add greenery without being too fussy!  A few differently shaped mirrors around the tv will help to anchor that wall as well.

When it comes to the design, it's all about balance.  It's always about balance and I feel like such a broken record.  The magic way to mix styles is to make sure that everyone has a buddy.  A metallic pillow will feel very lonely if there's nothing else shiny around it.... But this is a much larger post for another day.

If you're looking for some decor help, don't hesitate to reach out!!  Send me some images and info about your space and I'll send over a quote for your very own e-design.

I'm off for the rest of the week to bake, cook, wrap, and most of all celebrate Christmas with my family.  I hope you have an awesome week and a Christmas that makes you feel all warm and fuzzy inside.  ~XO Karen


Lucite Love

I never saw myself as a lucite person.  It always felt too modern or too weirdly retro (and not in the fun way that I'm ever so addicted to), or sometimes...dare-I-say-it cheap, but I've been singing another tune as of late. **As per usual, please pin responsibly and pin from the original source.  Gracias!!!**

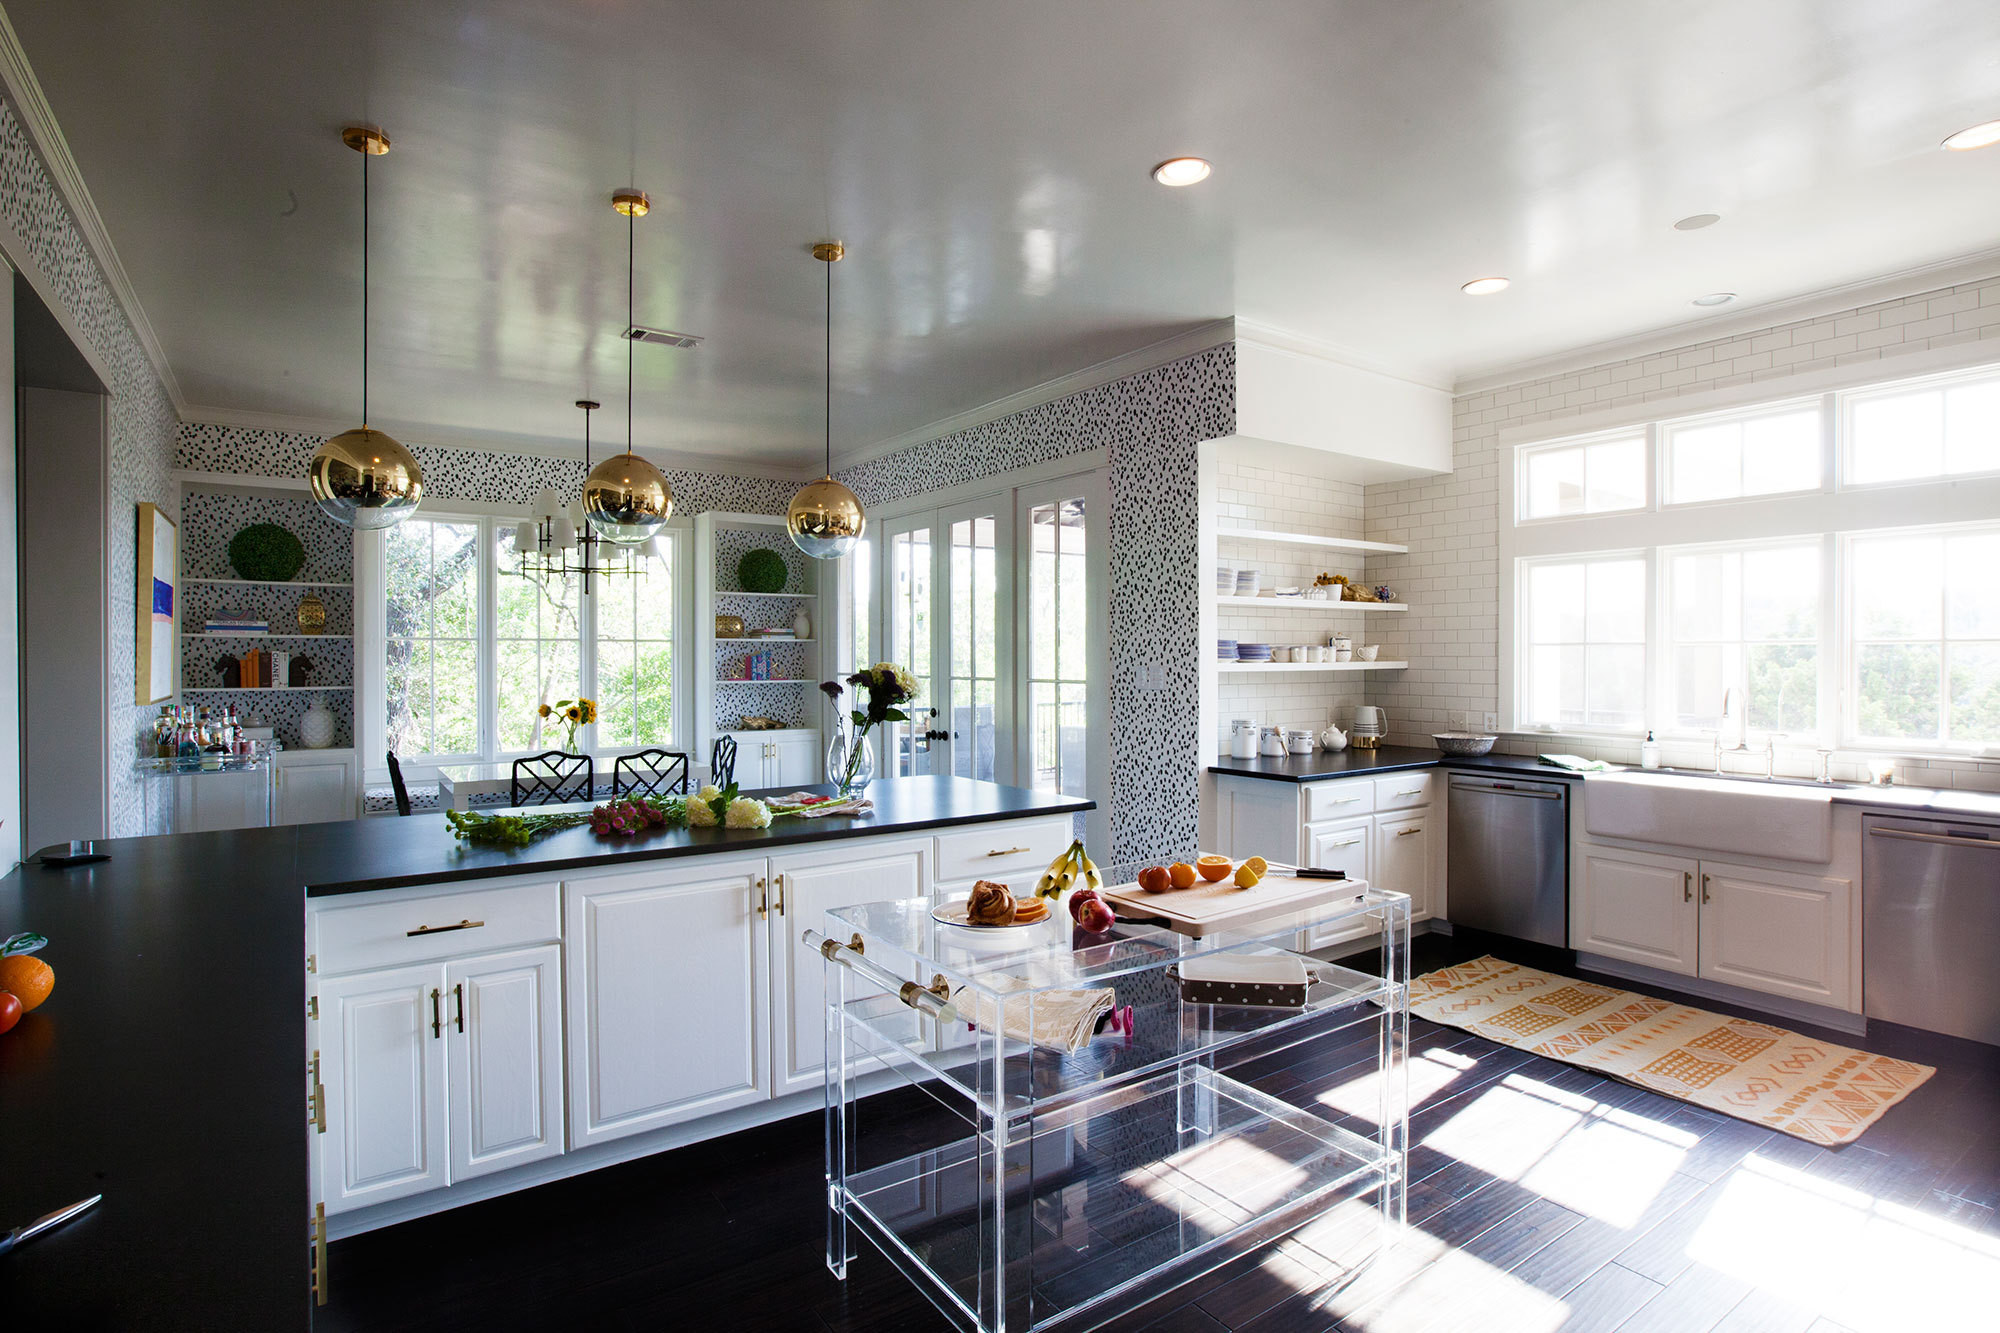
When I saw Katie Kime's kitchen in Lonny Mag, it stopped me in my tracks.  It's traditional but not stuffy, colorful without being overwhelming, and has a very sophisticated whimsy to it.  That lucite island is everything.  EVERYTHING.

Lonny Lucite Kitchen

Katie Kime is clearly a lucite Jedi master.  If you peak above, you can see a glimpse of a lucite bar cart which is available in her shop.  Dear Santa, this would be acceptable to find under my tree Christmas morning.  Forget the fact that it won't fit under the tree.... and I already have too much furniture in my house..... I'll make it work.  XO Karen

katie kime lucite bar cart

Then just yesterday, I saw this cozy space on chrislovesjulia's instagram feed.  This lucite coffee table doesn't feel modern, retro, or cheap.  I just is.  It serves a purpose without adding visual clutter to the space.  It's a quiet statement.  Bravo.  Doesn't this room just invite you to curl up with a book?

chrislovesjulia instagram study

I've also jumped on the lucite train apparently too.  On my instagram feed, you may have also noticed a bit of my own lucite a couple weeks ago.  In addition to these 2 lucite bowls, I also scored a simple lucite tray that has yet to be styled.  Estate sales for the win.

lucite bowls

While, yes, lucite can go wrong pretty fast, it can also go oh so right.  Are there any design trends or styles you find yourself changing your tune on?

Have a wonderful weekend!

Build It: TV Cabinet

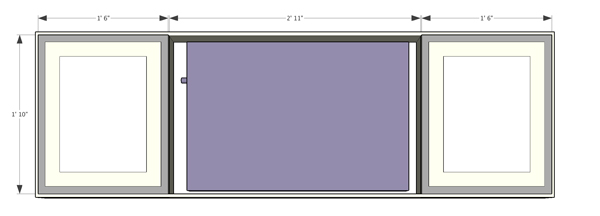
I'm so pleased to say that progress has been made on a project that I introduced you to a month ago!  The wall mounted TV cabinet for my office is finally all assembled and ready to be patched, sanded, and painted!  Let's chat about the whole super exciting building process today. I enlisted Handy Dad's help- when building things we're generally a pretty good team (plus he has more tools and space than I do).  Before breaking out the tools, though, I 'built' the TV cabinet in the 3d program Sketch-up so that we could really visualize how to make it happen.  The tv cabinet would have sliding panels on the front that would hide the TV when I'm in office mode and frame the tv nicely when my office turned into the den.

Build it: DIY tv cabinet - via Year of Serendipity

Build it: DIY tv cabinet - via Year of Serendipity

Over the past month, Handy Dad and I have cut out the pieces and routered a few pieces which I'll explain in a minute.  Let me first show you the breakdown of the parts.  I used 1/4" plywood for the backs and for the sliding door panels and 1x5 pre-primed pine boards for the box.

Build it: DIY tv cabinet - via Year of Serendipity

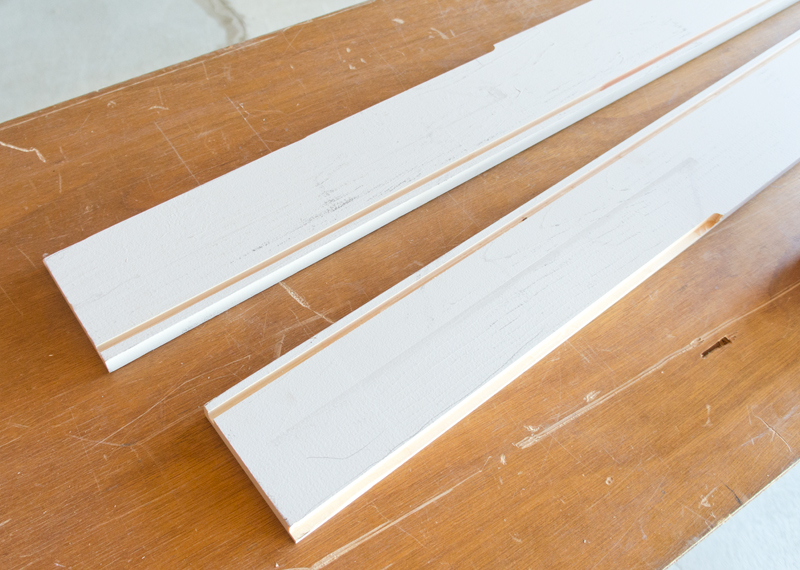
We used the table saw to create a few depths for the pieces.  The 4 outside pieces are the deepest and the inner pieces are narrower so that they can allow the door panel to slide past them with ease.

Once all the pieces were cut, Handy Dad and I used the table saw to add a groove into the top and bottom pieces for the door panels to sit and slide in.

Build it: DIY tv cabinet - via Year of Serendipity

Next we turned to what will be the back of the pieces and routered out a notch so that the back panels can be inset and the tv cabinet box can sit flush against the wall.  This needed to be done to the end pieces, the 2 middle verticals and to a section on each end of the top and bottom.  We over-routered a bit due to poor planning but that's totally patchable, so crisis averted.

You can really see the different depths of the boards in the pic below- the outside are the deepest, the vertical supports next and the horizontal shelves are cut even narrower since they will essentially be sitting on the pack panel and didn't need to be routed out for it.

Build it: DIY tv cabinet - via Year of Serendipity

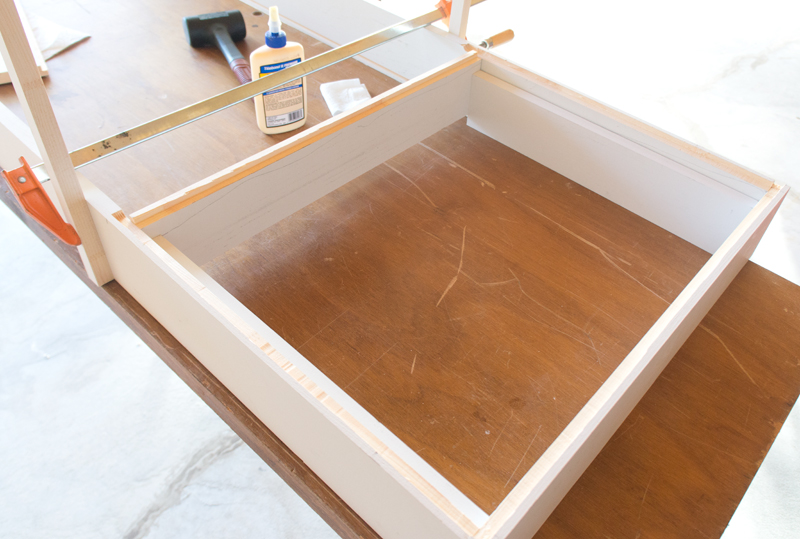
Now came the fun part- assembly!  Wood glue and a nail gun are your bffs.  It was helpful for this to be a 2 person assembly, but it could be a 1 person job if you had the right clamps.  The first piece to get put on was one of the end pieces.  Putting wood glue on the joint before lining it up and nailing together.  You can see the routed notch a bit better in this pic too.

Build it: DIY tv cabinet - via Year of Serendipity

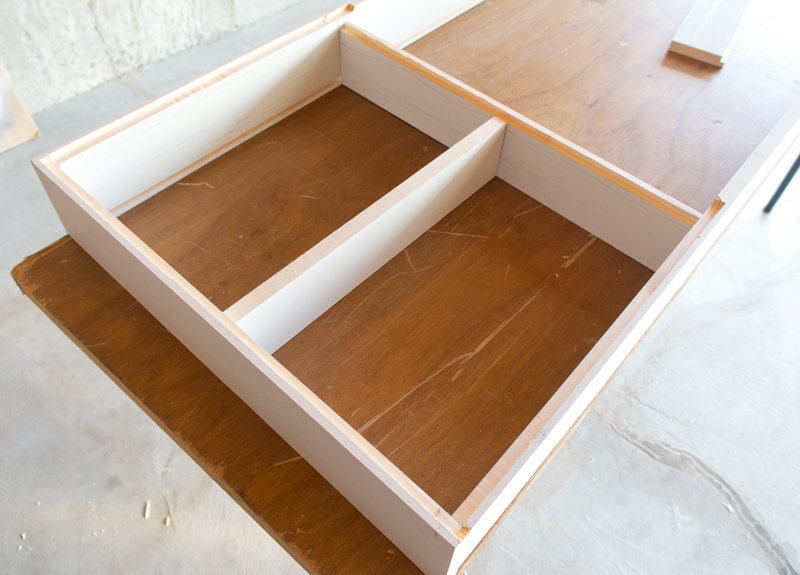
With the first end piece on, we then attached the middle vertical on that side.  Let me orient you a bit.  We're working with the cabinet face down, and since the doors will slide past the supports and shelves, they are getting inset a bit.  The clamp you see is keeping the vertical support aligned with the back of the cabinet and raised off the table by about a 1/2".  We used what will be the shelves to ensure consistent spacing, although they aren't attached yet.  Glue and nail.

Build it: DIY tv cabinet - via Year of Serendipity

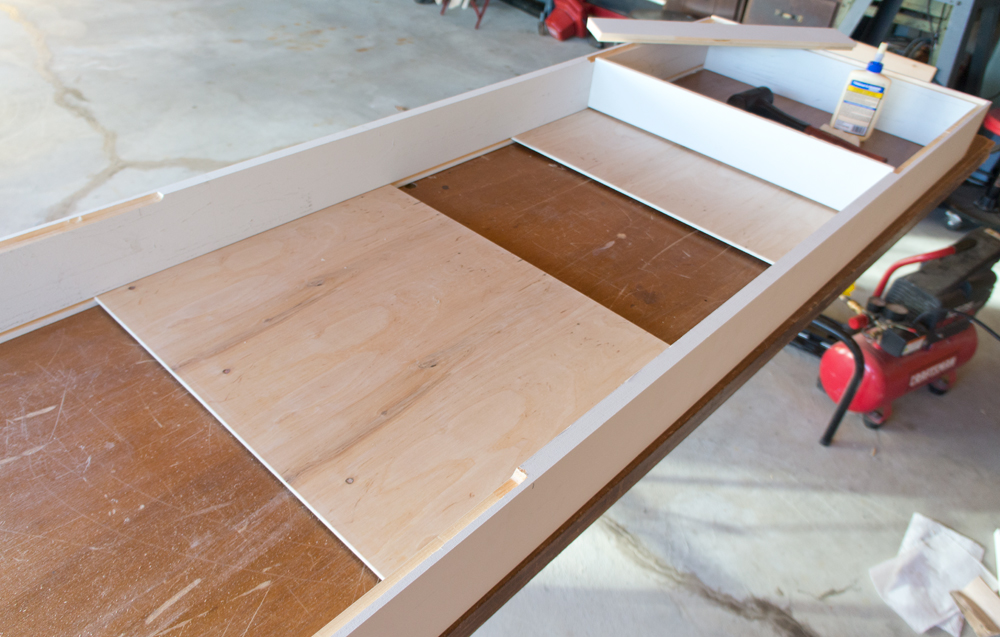
Now it's starting to look like something!  Before we could attach the other end piece, we needed to slide the door panels into the groove.

Build it: DIY tv cabinet - via Year of Serendipity

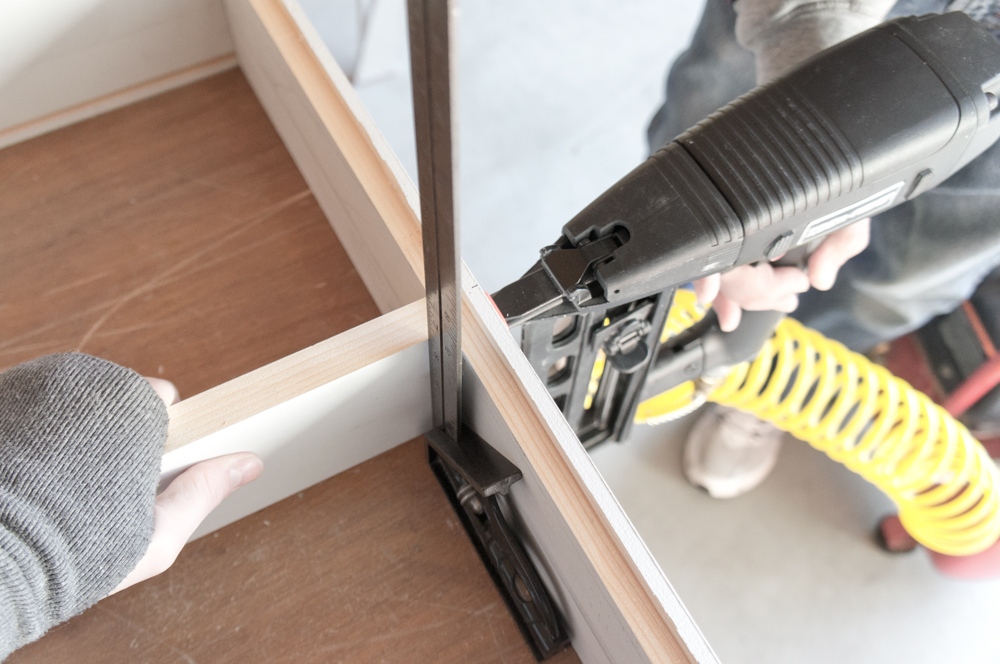
Rinse and repeat with the end and the vertical support on the other side.  With both end panels and both vertical support pieces attached, it's time for the horizontal shelves.  One of us held the shelf and made sure it would be square while the other nailed it in.

Build it: DIY tv cabinet - via Year of Serendipity

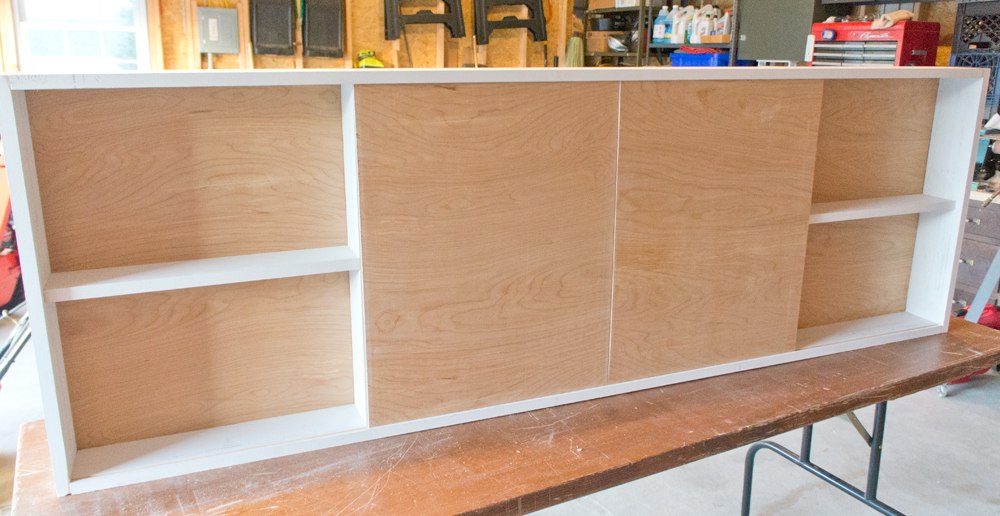
The last pieces to get attached are the pack panels.  We applied a generous bead of wood glue around the inside of the routed groove and on the back of the shelf.  Before the panel got nailed in, we put it in place and wiggled it around so that it and the glue really bonded.  I'm relying on these back pieces for a lot of the support!

Build it: DIY tv cabinet - via Year of Serendipity

As I mentioned above, we got a little router-happy, though luckily nothing that couldn't be remedied with a small scrap of wood and some wood filler.

Build it: DIY tv cabinet - via Year of Serendipity

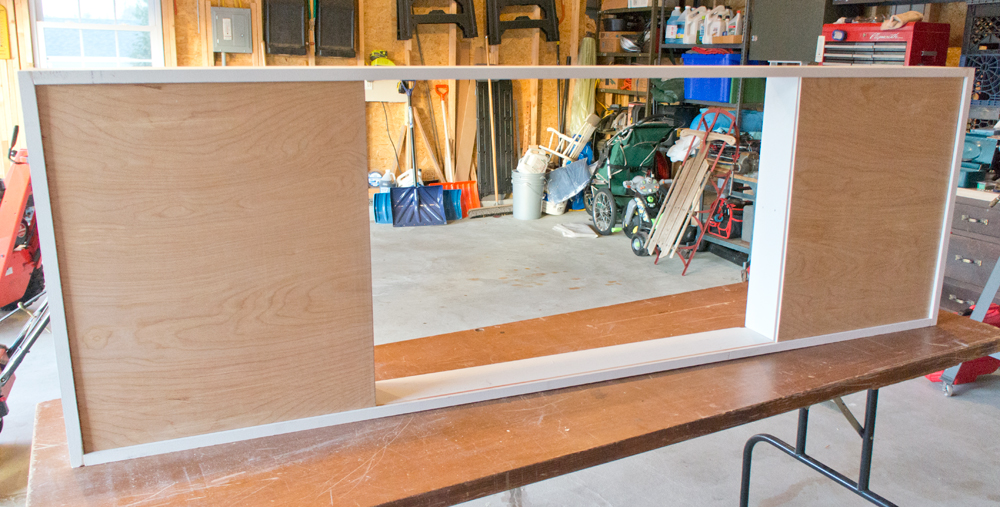
My favorite part is always the last step: standing back to admire what you just accomplished.

Build it: DIY tv cabinet - via Year of Serendipity

Peek-a-boo Handy Dad's garage!

Build it: DIY tv cabinet - via Year of Serendipity

I cannot wait to get my new tv cabinet all finished and hung on the wall!  For the next few days, this guy will be chilling out on my dining room table (the only surface in my house big enough that's not a central floor space) so that I can patch, sand, and paint it.

Hopefully by next weekend, I'll have this all set and Hubby can help me hang it.  A 6' long wall cabinet is not a one-person install job.  Are you as excited as I am to see this finally come together??