Designing with... Bold Stripes

Welcome to a new series: "Designing with..."  This series is going to to all about showing you how you can incorporate challenging, bold, or offbeat elements seamlessly into your home. Stripes are such a bold design statement, but it can be a bit tricky incorporating a big stripe into a space without overpowering it.  With bold stripes, the trick is to let the stripe be the star.


On a wall:

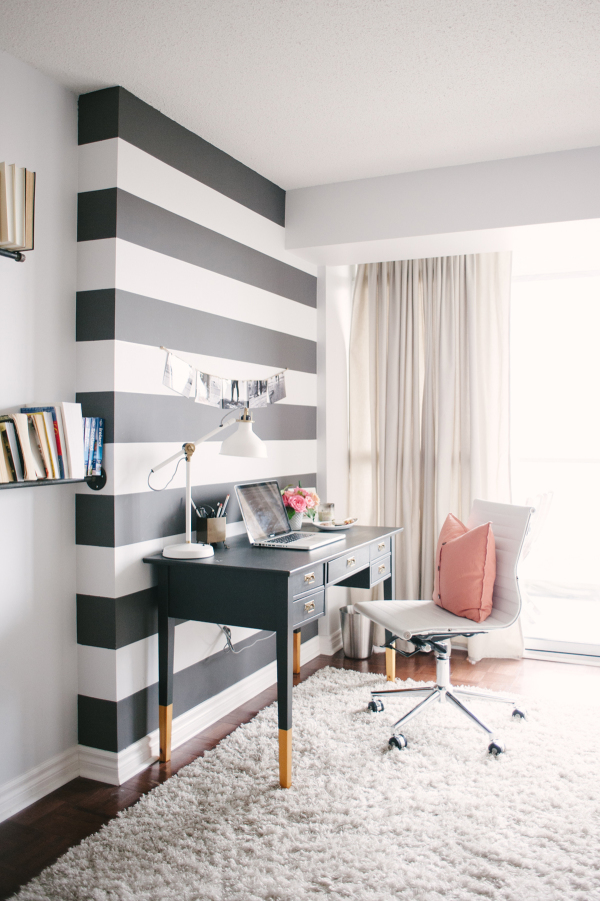
I wouldn't recommend an entire room with bold horizontal stripes for fear of it turning into a carnival attraction, however a single focal wall with bold stripes? You got it!  Choose a wall that is already a natural focal point or is a focal point due to furniture placement: behind a bed, surrounding a fireplace, or in this case, behind a desk.

Style Me Pretty Living: Black and White Office

source: Style Me Pretty Living, Lark & Linen Home Tour


On a floor:

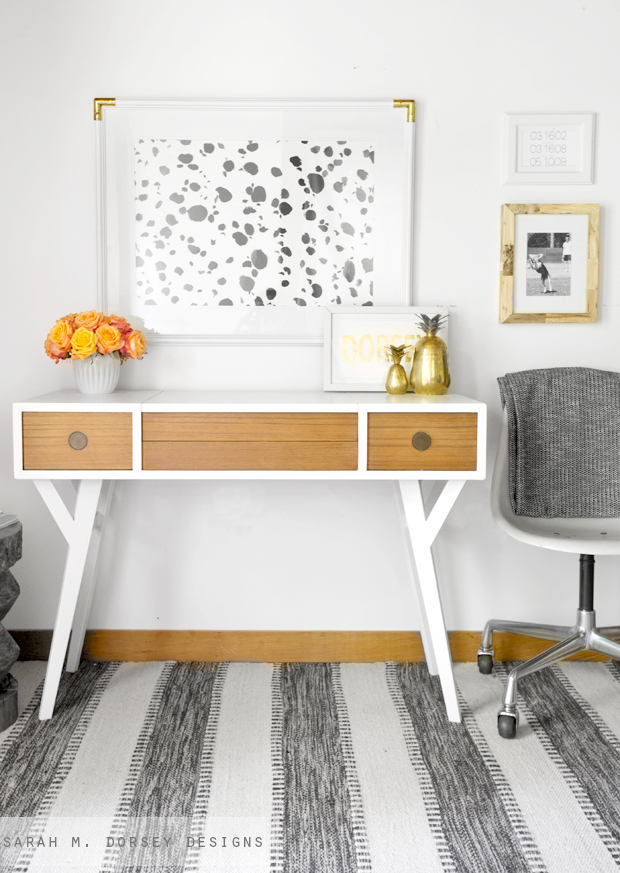
Draw attention to the floor without overwhelming it.  To balance out a pattern-heavy floor, bring the eye up with other interest and pattern in artwork or accessories.  Vary the scale so that nothing competes visually.

Sarah M. Dorsey Designs, MCM Desk

source: Sarah M. Dorsey Designs, Mid Century Modern Vanity | Adding Custom Legs


On furniture:

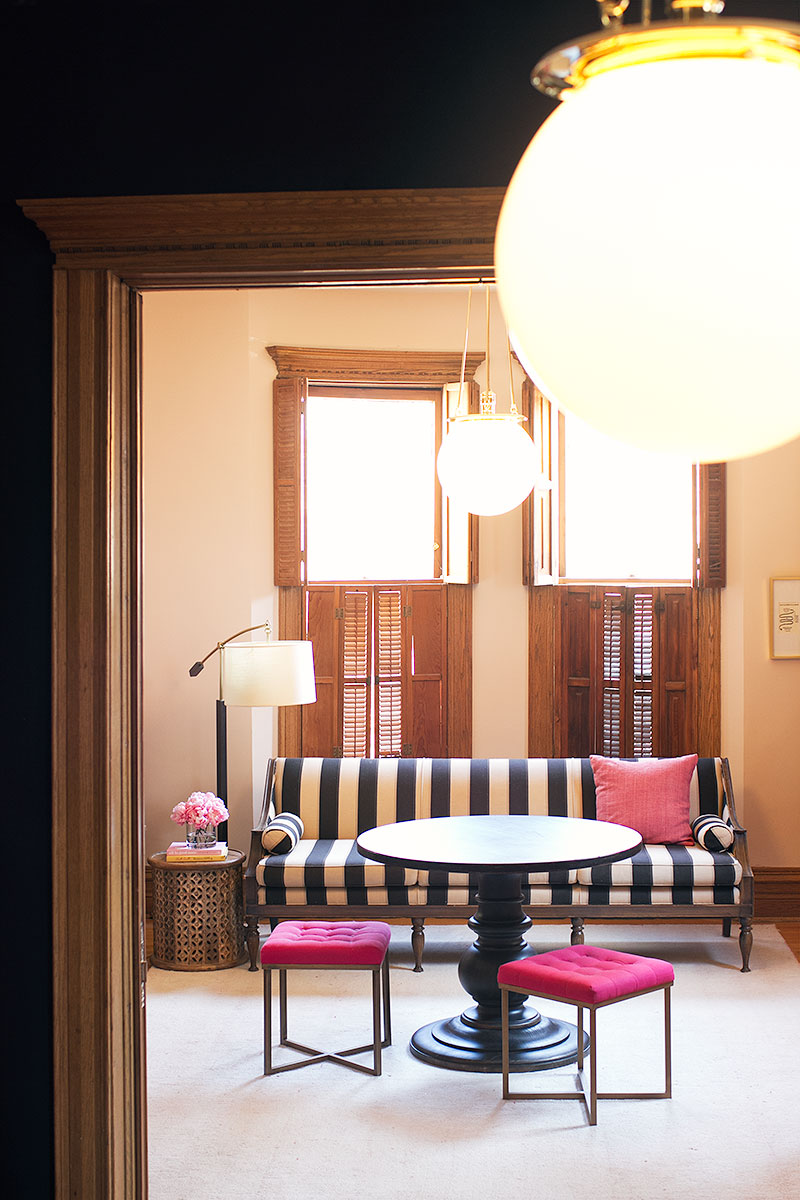
If you're feeling bold, a striped piece of furniture can be such a swoon-worthy element if done right.  Plan for the piece itself to become the focal point and other ancillary pieces should be supporting players.  Use pops of color, smaller patterns, and organic elements to balance out the space.

Making it Lovely: Striped Sofa

source: Making it Lovely, New Lighting in the Library


On a table:

The striking linear quality of a stripe paired with natural elements is a match made in heaven.  Opposites attract for a reason- the organic grouping of flowers softens the harsh lines, while the rigidity of the stripes keeps the flowers from feeling too dainty.

The Knot: Kate Spade Inspired Striped Runner

source: The Knot, A Whimsical Kate Spade-Inspired Wedding in Dallas, Texas


**Design disclaimer** As with all things in design, rules are made to be broken.  These guidelines are just a start, however once your stripe skills have been developed, possibilities are endless!


Future "Designing with..." posts will include polka dots, brass, and florals to name a few.  I'd love to hear what design topics you're stumped by and would love to see in this series (or in a separate post if applicable)!

Franken-Chair Reveal

Once upon a time, long, long ago, I decided to reupholster and combine 2 antique chairs. franken-chair-pieces

Ok so probably more like almost 6 months ago, but it feels like forever.  Well, aside from a few minor tweaks left Franken-Chair is finally done and functioning!

Franken-Chair-after

And Charlie Bear couldn't be happier.  Seriously.  I have to fight with this little fuzzball practically every time I need to sit down and work.

bear-chair

Franken-Chair took far longer than it should have to reupholster and isn't the picture of perfection that I was hoping for, BUT it's comfortable, functions the way I had hoped, and isn't an eyesore anymore.  I guess I can consider that a win!

Franken-Chair-after2

After my upholstering success with my other antique chair, I got a little cockier than I should have with Franken-Chair.  I thought I could rely on my sewing skills, but I forgot to take into consideration how the foam and curves would affect how the fabric stretched and attached to the frame.  I now understand why the original chair was upholstered in vinyl.  With a chair like this, a fabric that you can stretch to your needs is ideal.  Otherwise you end up with lots of wrinkles that cannot be avoided no matter how hard you try (and trust me, I tried!).

bear-chair-peek

I was tempted to try to photoshop all of the fabric wrinkles out of my images so I could have pinterest perfection, however that wouldn't be real.  I want you to learn with me for better or worse.  Eventually I'll hand this chair over to the pros and get it all done perfectly, properly, and in a way that will last for years.  Until then, however Franken-Chair is a pretty decent temporary solution if I do say so myself.

Franken-Chair-after

Not perfect, but who says it has to be.  Keepin' it real guys.  Have you had any projects go a bit differently than planned but still work out in the end?

Busy Week

It's only Wednesday, but this week has already been a big one in the Goodman household.  Aside from getting brandy new headshots for the new blog design (coming in May), several new design client consultations, and trading in my 20s girl convertible for a fun new Mini, Hubby decided to take a huge leap career-wise.  Very soon I will be married to a real estate agent!  It'll be a great move for this sales-addicted, budding real estate mogul, plus it won't be a bad move for our flipping business either.  Hubby gave his 2 weeks notice on Monday and since then, the reality of us both being self-employed is starting to sink in a bit.  I'm pretty sure we can handle it.  Wine will help.  So will kitten cuddles. Speaking of kittens, Daisy got some new head shots too.  She was shockingly cooperative during the photo shoot with Stephanie Rita.

daisy-headshot

I wouldn't be shocked if there were an equal number of shots taken of the cats as there were of me.  They were on their best and cutest behavior and I didn't even have to bribe them with treats!  Pop over to Stephanie's blog to see a preview of the human-focused part of the photo shoot.  These photos are going to look awesome on the new site!

Anyway, I'll be back on Friday with a REAL post!  And not just any post, a DIY post!  I'm just putting the finishing touches on Franken-Chair before it's big reveal.  It's long overdue!