Millie: Week 21

I hope you enjoy these weekly updates as I learn to navigate through the business of flipping houses.  This flip, Millie is the most challenging and most exciting yet! You can find more about this house and about my 3 previous flip houses here. I can't believe it's week 21.  I definitely took on a much larger project here than I realized (considering no flip before this has gone past week 18), but we're still mainly on track for the list date we've been planning all along.  We've been shooting for early March since day 1, so thankfully despite the fact that I took 2 months (!) doing the exterior and several weeks demoing a basement ceiling, I'm not too far behind.  It definitely helps that in the past few weeks I've been putting my nose to the grindstone and working on the rooms that need the most.

Last week was the upstairs bathroom, this week was a little bit more that, but a whole lotta master bathroom.

Before we check out the master bath, hey look, a grouted floor!

millie-w21-grout

The bench also has a working top, although the 2 built-in door fronts (the bottom 2 cubbies) need a little bit more finagling.  I have some grout touch up and clean up to do today, but I am pleased to say that fixtures are scheduled to be installed early next week!

Now venturing back downstairs to the new master bathroom, it almost has a door!  Well, it has a door, but it's not finished and not fully functional yet, but it's there.  My contractor has some tweaking to do and still needs to install the leaded glass.  That glass is going to take this room up about 10,000 notches.

millie-w21-pocket-door

So now, a room that use to have a very wide opening and was just kind of an odd paneled reading nook.....

Millie-library-5

is well on it's way to bathroom status.  I've been shiplapping my heart out

millie-w21-master-shiplap

(and playing with the panorama on my phone to try and get a more complete pic of this small space)

millie-w21-master-1

I only have 3 walls shiplapped and I still have a few boards left to prime, as you can see- then on to paint.  Nice crisp white paneling.

millie-w21-master-2

Wall #4 is waiting for the new door and trim to be complete before getting installed.

millie-w21-master-3

The windows will be frosted so the neighbors don't get a show and stained crown molding will top off the room to make it uber fancy.  (anyone else just start singing "Fancy" in their heads?)  I know this sounds cliche, but this looks so much better in person.  The shiplap a nice texture without being in your face and once it all caulked and fully painted, it'll be dreamy.

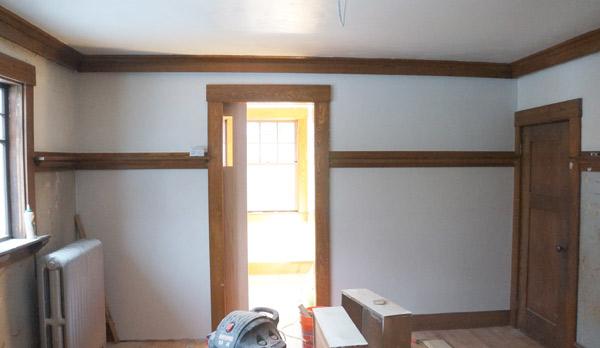
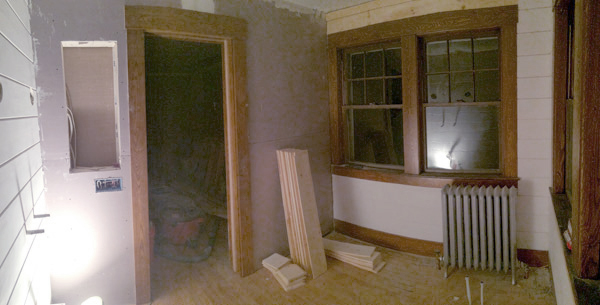
Another area that started getting some attention this week also, was the master closet (the door to the right of the bathroom in the second pic of this post).  Originally this area was a pass through to the kitchen and had 2 small closets back to back.  Oh yeah, and it had the same linoleum floor parfait as the kitchen.

Millie-Future-bathroom-1

Now, not only is it closed off from the kitchen, but it's going to be a pretty decent master closet for the new buyers.  Not a huge closet, mind you, but it'll have about 10 feet of hanging rods, shelves, an original built-in, and hardwood floors, so I don't think that's too shabby.

millie-w21-master-closet

With a little bit more attention needed in both bathrooms next week, I'm hoping to move on to the next big ticket item- the kitchen.  Cabinets are supposed arrive in a week and a half and I intend to have the rest of the room ready for them!  That means updating and repairing some existing cabinets, repairing and patching the wainscoting around the room, and lots and lots of paint.  Let's do this!!!

Mid Week Inspiration

Winter must be a slow time for Craigslist.  With my usual perusing, I haven't been able to find anything worthy of a Craigslisting post or a Make it Work post lately.  Poor showing Craig. Confession: I've been super duper kind of stressing myself out this week about the flip, so I'm in the mood to look at some pretty and inspiring pictures.  We'll return to our usual programing on Friday with some nice flip progress.  Until then, swoon over these.

***usual disclaimer: please pin responsibly and do not pin from my page for these sources.  Please click through to the original source and pin from there so they get the proper credit.  Muchos gracias***

Updated California Bungalow by Evens Architects via Houzz.  Don't worry, I won't be painting any woodwork in Millie, but isn't this just stunning?

main.original.585x0

There is so much "yes" here that I would live in this kitchen if given the opportunity.  I wouldn't suddenly discover a love of cooking, I'd probably just be creepy and bring in a blanket and pillow and curl up like a house pet on that amazing floor.  Do herringbone wood floors make anyone else weak in the knees?  If I wanted to fork over $605 a night, I could vacation here via onefinestay


eclectic-amazing-batgroom-tiles-elizabeth-roberts-2

I love a good mix of pattern.  Somehow, this works amazingly due to the variation in scale.  This may actually be a little to much for me to live in, though, but I wouldn't complain with a visit.  It's like a super decadent chocolate cake that is so deliciously chocolatey that you can only have 2 bites before ODing and going into a chocolate coma.  This is that in bathroom form. (from Ensemble Architecture)

And since I have shiplap bathrooms on the brain today (check out my instagram if you're wondering why): plank-walls-in-bathroom-bhg

Nice, pretty, crisp, and clean.  I plan to one up this one cuz, well, why not, but this bathroom from BHG is just pleasant.

Time to dig back into the mess that I call and flip house and power through the rest of the week.  See you Friday!

DIY Wire Word Art Teaser

Back when I designed my nephew's room 2 years ago, I incorporated this print: Dream Big Little One nursery print via Year of Serendipity

My sister fell in love with the sentiment and wanted me to incorporate those words into my niece's room.  I've been rather cryptic with my plans but keep telling her "don't you worry, I have plans for it!"  Well, Dear Sister, guess what's soon going up on your wall?

Dream Big Little One wire word art via Year of Serendipity

Cursive DIY wire word art.  I'm calling this a 'teaser' post, since I have yet to install this beaut.  I've wanted to include this in Lyla's room since I knew my sister was expecting again.  The wire words just ad such a whimsy without being cutesy or kitschy- both of which we wanted to avoid in her house.

Once I sat down to try my hand at these words, I was pleasantly surprised how easy it ended up.

DIY wire word art tutorial via Year of Serendipity

The only things needed to create this are:

  • printed word templates-  I use the font Halo Handletter and played around with sizes until I liked the scale
  • aluminum wire- from the jewelry section of the craft store.  Mine was copper finish, but was also available in black
  • wire cutters
  • steady hands

This is surprisingly easy to do once you have a template.

Starting your first letter, leave a tail of a few inches.  This will allow for mounting later.

DIY wire word art tutorial via Year of Serendipity

The wire is so pliable that all you need to do is gently hold it in place where you want to bend and slowly bend it following your template.

DIY wire word art tutorial via Year of Serendipity

Perfectionism is actually a detriment to this project.  Once you make a bend, only minor tweaking or smoothing can be done.  If you man-handle the wire too much, you'll lose the smooth look and it'll start getting kinks.

DIY wire word art tutorial via Year of Serendipity

If you're doing a longer word like "dream" here, for the second half takes a little bit more coordination to align it with your template.  That's why an imperfect cursive font is ideal- if you letter is a bit off of the template, once complete, no one will be any the wiser.

DIY wire word art tutorial via Year of Serendipity

Once complete, you have wonderfully economical statement art.

Dream Big Little One wire word art via Year of Serendipity

Now you just have to decide what you want to do with your words or phrase.  If you plan to lean them on a shelf, you can simply trim off the tails at the beginning and end and style them on your shelves.  Since I plan to hang this on a wall slightly offset, I bent my tails backwards.  I'll go over what worked and didn't work for wall-mounting once I get them up in my niece's room.

I'm loving this project so much, I'm debating making them to sell in my etsy shop.  Any buyers?