Strong Like Bull

This week may be a light week for blogging- my computer's on the fritz again, so my apologies ahead of time. We now return to your regularly scheduled programming.

Tubs!  Wait, didn't I already blog about this?  Yes, but now I got one of the 2 tubs that I need and I just KNOW you want to hear all about it!  Or something like that.  In reality, I was searching high or low for someone to tell me how hard or easy it was to move a cast iron claw foot tub and couldn't find anything helpful, so I'm hoping to provide that service to someone else.  I'm only thinking of you.

Have I mentioned before that I love Craigslist?  Only once or twice, I'm sure.  I remember the primitive days when my dad would list things in the Bargain News.  My how far we've come.  I was able to procure an antique cast iron tub in rather good condition for $20.  Yes, $20!  (ended up costing a little bit more, but I'll explain)

The deal was the I could buy this tub from amongst the rubble for $20 IF....

Tub amongst the rubble via Year of Serendipity

...I moved it down 3 flights of stairs

tub stairs

I'm sure you can see my dilemma.  $20!  yay!  3 flights of windy narrow stairs? boo!  A huge part of my dilemma came from trying to figure out how to move something of this sheer weight.  I'd estimate it around 300 lbs.  With Hubby at work and not willing to call in any friend favors to move a tub for my business, I realized I needed to pay someone.  One moving company quoted me $550 with a truck and 3 guys- that's more than I paid to move all the staging furniture!  No me gusta!  Luckily my next quote was much more my speed.  A man with a van.  Literally the name of his company and he came with many 5 star yelp reviews for helping people move Craigslist purchases.  $170 to help me move it from the 3rd floor, transport it, and move it into Millie?  You got it!!!

Let me tell you, yes a cast iron claw foot tub is heavy, BUT it's not nearly as bad as I was afraid of.  It took Mike the Mover, the seller and me to move it down the stairs.  The 3rd person was honestly only for security and logistics (making sure no one has a tub fall on them).    It definitely helped that the feet were already detached and I would highly recommend that to anyone!

cast iron claw foot tub feet via Year of Serendipity

One thing that made it easier is that we were moving it from a house that was being completely gutted, so letting the tub surf (guided and controlled of course) down the carpeted stairs wasn't a problem.  If I was moving it from a house that we'd have to worry about scratching stairs or wall, we'd naturally have to be more careful and take a bit more time, but I would imagine that the process wouldn't change much.

Once on flat ground, the tub was pretty easy to maneuver.  I swear!  It may be heavier than a couch, but it's smaller, so the lack of bulk makes it easier to move in my opinion.  Mike the Mover used a hand cart to get it from the stairs to the front door, then it was furniture dollies from there.  It took us only 2 people to lift the tub onto a furniture dolly and roll it as needed to the vehicle and from the vehicle to Millie.  It even wasn't bad lifting it up 4 stairs to get to Millie's porch.  I'm sure Mike the Mover was skeptical when he saw this skinny girl claiming she could move a tub, but I'm strong like bull!  It didn't take nearly as long as I expected to get it from one place to the other.  Now my new tub is hanging out in Millie's sunroom so I can paint the bottom in a well ventilated area.  I keep flip-flopping between white or black.....

upside down cast iron tub via Year of Serendipity

I swear, if you can move a couch, you can move a cast iron claw foot tub!!

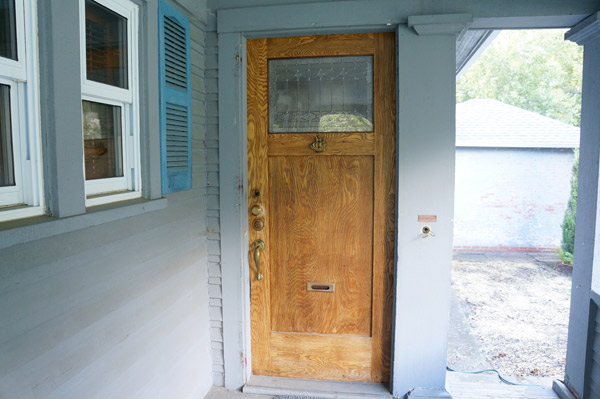
So there you have it.  The story of how I got a $20 tub on craigslist, paid $170 for help moving it and a priceless story knowing I'm capable of moving a cast iron claw foot tub.  Now I only need one more for the upstairs bathroom.....

Millie: Week 4

I hope you enjoy these weekly updates as I learn to navigate through the business of flipping houses.  This flip, Millie is the most challenging and most exciting yet! You can find more about this house and about my 3 previous flip houses here. Hm, somehow I've gotten to week 4 and have mainly tackled yard work.  I guess that says a lot about what needed to be done out there.  I do, however, want to apologize to the neighbors- it gets worse before it gets better.  It currently at 'worse' stage.  Piles of brush... half ripped down fences... it's pretty sexy.

Millie the flip house week 4 fence

BUT at least some rebuilding has commenced!!!  The deck which once sat on footings that were at about a 30 degree angle, had a wobbly railing and severely warped stairs is now on it's way to being solid, safe, and pretty again thanks to my contractor.

Millie the flip house week 4 deck before

Millie the flip house week 4 deck

Meanwhile, I weeded more.  Weeding is not very photogenic, but I also changed the edge of one planter to open up the back corner a bit.  Grass will be planted once the brush piles and stumps are taken care of, and those delightful bricks will make for very good dumpster fodder.

Millie the flip house week 4 yard progress

Not a drastic change from last week (below), but baby steps here.  You don't eat an elephant in one bite.

Millie the flip house week 3 yard progress

Amidst the destruction and debris in the back yard, a few of the rose bushes are still smiling.

Millie the flip house week 4 roses

Luckily, the destruction has ended in the front yard and I was able to plant some grass.  Fingers, toes, and whatever else crossed in hopes that my black thumb actually allows grass to grow.

Millie the flip house week 4 grass

On the other end of the front yard, what I call the terrace side (the little sidewalk/street)..... the contractor is mid-way through rebuilding nice safe stairs over the old sunken concrete ones, I planted more grass, ripped down more fence and finally got rid of the hideous storm door.

Millie the flip house week 4 front progress

Sadly, I've come to the conclusion that the only way to repair the door from the wonky and broken locks that I showed you in this post is to patch and paint.  I'll shed a tear as I paint over the beautiful wood, but it'll be better in the end.

Millie the flip house week 4 front door

Unlike previous weeks, I actually have some interior progress to show!  Well, not so much progress as demolition, but still. #smashysmashy!

Millie the flip house week 4 bathroom demo

While demoing, I realized there was a pseudo-reason for why the plumbing side was bumped out 6 inches and the other side was tiled out past the molding.

Millie the flip house week 4 bathroom demo

When this bathroom was originally built, there must have been a claw foot tub.  Modern tubs just. don't. fit.  In the 70s when they renovated this was their way of trying to fit a square peg in a round hole- or I guess in this case a rectangle peg in a different sized rectangle hole.  AND since I don't feel like paying an exorbitant amount of money to get a tub the right length that would still bump out past the moulding... claw foot it is!  I've apologized to my plumber ahead of time that he'll be moving a very heavy tub upstairs.

Also when they renovated in the 70s, they didn't exactly waterproof, which explains the water stains in the future bath below.  Drywall was applied right to the plaster and was then tiled over.  In some areas, this drywall acted like a sponge (ick), but other dryer areas it made for easy demo.  This entire wall, tile and all, came off in 1 piece.

Millie the flip house week 4 bathroom demo

If you follow me on instagram or facebook, you already saw the amazing wallpaper that was lurking beneath.  It definitely follows the nautical theme that one of the previous owners started.  The best part about the wallpaper is the Boston area maps in the background.

Millie the flip house week 4 bathroom wallpaper

Next week is sure to be an exciting one around these parts as things finally start to happen!

Make it Work: Furniture Vanity

Ok, I totally have a one track mind planning out the new master bath for this flip.  In order to monopolize on this and not completely bore you, I figured I'd turn my obsession into a "Make it Work" post. If you missed the first post in my new Make it Work series, it's all about not just showing you a cool vintage or thrifted find, but also showing you how to make it work in a space.

Today's Make it Work moment comes from the idea of repurposing a piece of furniture into a bathroom vanity.  This little guy caught my eye on craigslist this morning.

00E0E_2ZITb5HIFpc_600x450

At an asking price of $95 (including the mirror) it is not a priceless antique.  Chipping veneer and other cosmetic damage make this perfect for repurposing (contrary to popular belief, I usually refrain from painting quality pieces.  This is not).

If done right, a repurposed furniture vanity looks like it was always meant to be that way.  I love almost everything about this bathroom from Better Homes and Gardens and it raises the vanity question- old or new?  In this case, it's probably a vintage-inspired new piece, but why go vintage-inspired when you can go true vintage?

BHG butter bathroom

Sadly in my soon to be master bath, there isn't enough room for a double vanity, although if there was, this buffet would make for a dreamy double vanity.

01212_l69Ys1Rr9OA_600x450

Returning to the little guy I showed you at the top, how would I make it work... so to speak...

One option would be to simply add a vessel sink to the top like so:

0ea86fe548252ec23f15f29625f5d746

(I'd like to credit the original source, but pinterest dead-ends me.  Help if you can!)

In the case of the craigslist piece we're looking at, I'd go for a new marble or stone top with undermount sink.  The fun part here is for a stone piece this small, you have a very good chance of being able to get a steal of a deal on a remnant piece from a countertop installer.

Make-it-work-cl-vanity

1/ Farrow & Ball Lulworth Blue- this cool gray blue painted vanity on top of my planned wood floors would be heavenly.

2/ Rejuvination's Jordan Valley Sconce is the perfect mix of modern with a nod to craftsman

3/ Hello statement mirror, how are you today? Brooke Mirror via Z Gallerie

4/ Vintage-inspired faucet- Rollins Faucet via Rejuvination

5/ If no budget remnants are available, this Carrara top from Home Depot would do the trick


So what do you think?  Should I pull the trigger for this new master ensuite and repurpose a vintage piece?