projects

More Office Progress

Since my last Office Updates post, not a whole bunch has changed.  I should really know better by now than to try and do any projects in my own home while in the midst of a flip.  While the to do list hasn't gotten shorter, I have been making progress towards completion now that I've shifted my focus back home. To recap and refresh your memory (since it was months ago and who can remember that far back)... so far this room has gotten:

-Uncovered and refinished 100+ year old wide plank pine floors (happydance)

-New baseboards and trim to match the rest in the house

-Repainted walls

-A new layout and new (to me) antique desk

-Cable ran through the wall so it doesn't wind around the entire room's baseboard anymore (another happy dance)

-Custom cat perch

-A new light fixture

office-progress-3

The remaining To-Do list for this itty bitty room is:

-Create cabinet to hide TV

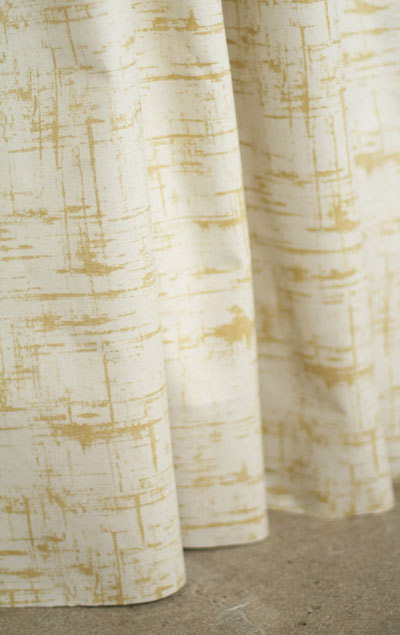
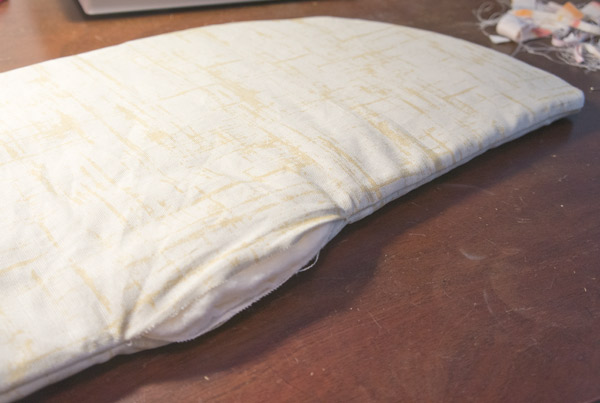
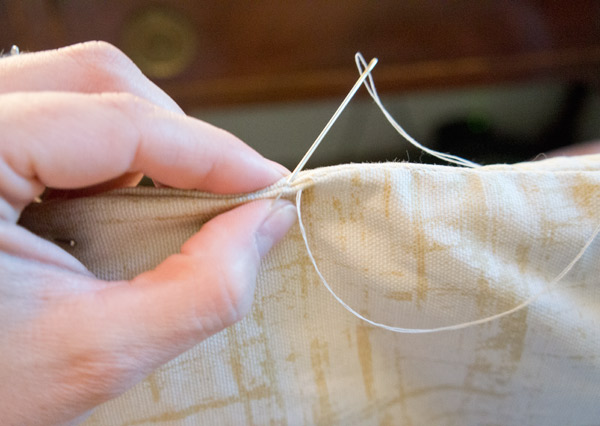
-Make pillows for settee (one is made!)

-Make or buy roman shade

-Reupholster and put rolly base on vintage chair

-New knobs and paint cubby doors

-Way way in the eventual- refinish antique desk (so far in the eventual that it'll probably be 5 years away, but a girl can dream)

-Hang plants in corner next to window

-Metal pipe picture rail above settee

-Style and organize! (let's add a few !!!!! to this item for good measure since it's the most fun part)


A rather long list for a room that's less than 100sf, huh?  But it's doable... I just need to DO it.

The first item on the remaining To-Do list Handy Dad is currently helping me with.  A custom TV cabinet.  Since this is my office primarily and den/tv room secondarily, I want to be able to cover up the tv with some pretty art and have it be out of sight out of mind when I need to focus on working.

After much debate and back and forth about how to engineer it, I ended up planning a shelf system with sliding doors.  I'll apply store-bought frames to the doors after construction and the art (hopefully) will slide with ease.  When the TV is in use, it will be framed out and flanked with beautiful art.

tv cab 1

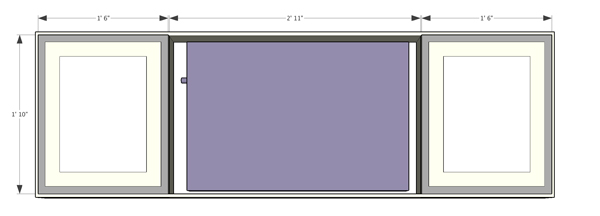
When not, there will be a decorative shelving unit with statement art in the center.

tv-cab-2

Aside from gray frames and colorful art, the rest will be painted white to match the walls and trim and not get too busy.  Like I said... <100sf.

As for the statement art, I've been positively drooling over this art from etsy.

etsy-art

So far Handy Dad and I have solidified our construction plans and started to cut out all the pieces.  Hopefully we can start the assembly this week!

Flip Updates

I don't mean to leave you guys hanging with flips- I post a reveal and then say nothing else for weeks?  Not fair. Dori-after-kitchen-4

Well, Dori's still up for grabs.  The super hot summer market seemed to drop out the second we listed this flip.  Sad trombone.  While we're certainly antsy, we're still confident she'll sell for a decent price as soon as the right people see it.  Waiting isn't our strong suit, though.  Luckily we've moved on to other real estate distractions.

We're buying a condo!  Not to live in, but to rent out!  I'm taking off my "Nicole Curtis" hat and putting on my "Scott McGillivray" hat temporarily.  Rentals has been one of our goals since starting flipping and it was finally time.  I'm not going to go into toooo much detail since we won't officially own anything until the end of the month, but I see another kitchen renovation in my very near future.  Gotta make this tiny, gloriously '80s, laminate kitchen shine so that every renter ever will want to live here.

condo kitchen before1

condo kitchen before2

If you've ever watched HGTV's Income Property you know the caliber of the property will dictate the caliber of the tenant- and we want a good tenant!  I'm probably going to go pretty basic in here- white cabinets to the ceiling, subway tile (because I already have a stock of them and they'll look bright and nice), and granite countertops.  Granite vs. laminate was already a debate, but for such a tiny kitchen, the cost difference is so insignificant and granite will be longer lasting.  We're hoping that once we take ownership I can get my contractors in to bang this kitchen out so we can get it rented out for the beginning of the year- Fingers crossed!!

Until then, I'll be busy frolicking in this unseasonably warm weather we've been having this week.  Have a wonderful weekend!!!

Let’s Get Catty- part 2

I established yesterday that my office wouldn't be complete without a DIY cat perch.  But what kind of crazy cat lady would I be if I didn't also provide a cat perch cushion?? DIY cat perch cushion via Year of Serendipity

I wanted to add a little bit of padding, that could also be cleanable.  I had fabric waiting in the wings for an upholstery project in another room that I had extra of that I thought would be just perfect.  Enough pattern to be interesting, but subtle enough to become more of a texture.  It has a nice little metallic gold fleck in it without being annoyingly glitzy.  I'm planning some bold shades in here so I don't want the fabrics to compete.

sterling gold fabric from Tonic Living

(fabric and image via Tonic Living)

I started by tracing the cat perch onto several layers of quilt batting, then using that as a template to cut my fabric.

DIY cat perch cushion via Year of Serendipity

In order to end up with the batting in the middle of the 2 pieces of fabric, you need to layer them into a weird sandwich before pinning it all together: fabric face up, fabric face down, and the batting on top.

DIY cat perch cushion via Year of Serendipity

Pin all 3 layers together before sewing.  (please excuse the cutting board- it's been with me since college and we've bonded, but he's seen better days...)

DIY cat perch cushion via Year of Serendipity

DIY cat perch cushion via Year of Serendipity

Be sure to leave an almost 6" gap unsewn on one side to allow you to flip it right side out.  I left my gap on the long straight side, since that would be facing the window.  After sewing, pull your corners through the gap until your cushion is starting to look more like, well, a cushion.

DIY cat perch cushion via Year of Serendipity

Once your cushion is all right side out and straightened out, it's time to sew up the gap.  I use a hand sewing blind stitch that my mom taught me when I was a wee lass, but instead of trying to explain it myself, YouTube exists.  How to sew a blind stitch.

DIY cat perch cushion via Year of Serendipity

I could have just left the cushion here, but I wanted to add one more level of interest.

DIY cat perch cushion simple via Year of Serendipity

I sewed a simple stitch with my machine a few inches in on all sides to create a border.

DIY cat perch cushion via Year of Serendipity

But the real test here was the kitten test.  After bringing Daisy in to give the cushion a try, she debated a moment then made herself right at home.

DIY cat perch cushion via Year of Serendipity

Then completely melted.

DIY cat perch cushion via Year of Serendipity

I'd consider that a win.

It's a pretty good bet that one of the cat's is hanging out here- we call it Master Kitty Theater.  Looking out the window is like tv for cats.  Those birds out there provide lots of drama.

DIY cat perch cushion via Year of Serendipity

DIY cat perch cushion via Year of Serendipity

Even the ladybug that's been flying around my office for the past week is making herself at home on the new cushion.

DIY cat perch cushion via Year of Serendipity

And that my dears is proof that cat furniture doesn't have to hurt your retinas.  For another pleasingly stylish cat accessory, check out Designlovefest's DIY cat bed.  So adorable!  We're on a mission to eradicate ugly cat furniture once and for all!