A Girls and Her Tools

Alternate title: 7 Handy Tools for the Handy Gal (or Guy) I like tools.  Tools are fun.  They help me wreck things, make things, and make things pretty.  Plus, I won't lie, I kind of enjoy shattering people's traditional gender roles "what do you mean my husband's tools?  MY tools.  He gets the kitchen."  Boom.  Welcome to 2014 ladies and gents!

A full list of tools that I find helpful would be near endless, but I thought it might be helpful to share a few of my favorite handy tools for DIY.

1.  Compressor

Harbor Freight Compressor

This one is necessary to accompany the next 2 of my favorite tools so I couldn't leave it out.  My compressor collection has raised to 2, a small portable one and a larger one with more power and both have their jobs.  If you're just starting into projects and tool collecting, I'd start with a small pancake compressor like this one from Harbor Freight.  They're light, portable, and have the power to do most small jobs.  A big need for my tools is portability since I don't have a workshop or garage where I can store them.  They're either in my basement or at a work site, so something helpful that's easy to move around gets 2 thumbs up from me.

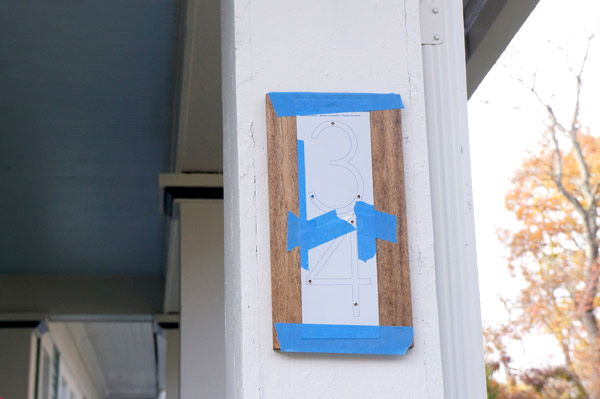
2.  Brad nailer/nail gun

House-number-nail-gun

Speaking of tools to use with the compressor.  This guy is #1.  I'm not sure how I ever lived without my nail gun.  I think this may be my personal favorite: it's so easy to use- press into surface, pull the trigger.  For such an easy tool to use, you can make some mighty projects.  My entire built-in corner bookcase was put together with my nail gun and wood glue- and it's strong enough to climb on (although I'd rather you not).

living-room-sketch-reality

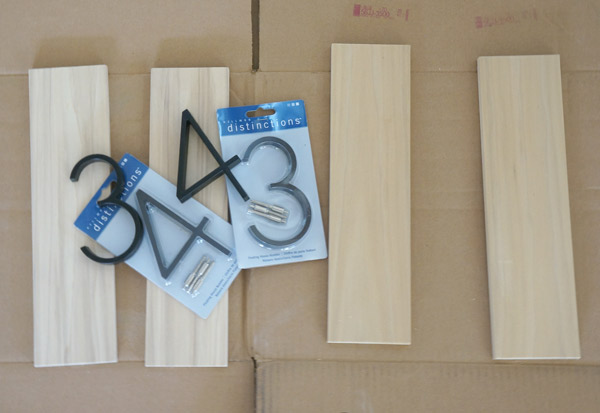
AND even though it's a rock star on large projects, no project is too small.  Use it to fix a loose piece of trim or like I did to beef up Millie's house numbers.

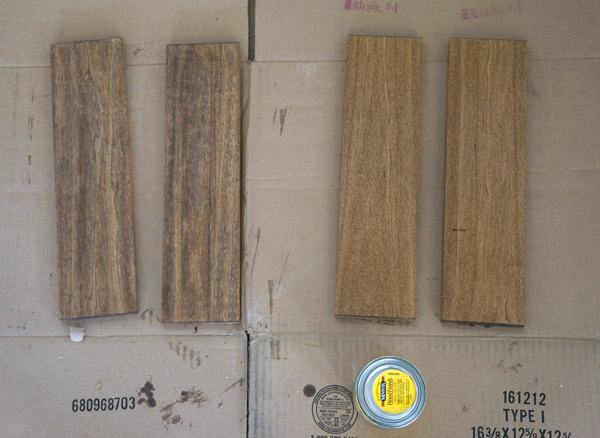
3.  Critter spray gun

Compressor tool #2!  The Critter Sprayer is what I use my larger compressor for.  You can use a smaller one, but be prepared for it to run non-stop.  This little siphon paint gun does not get enough recognition in DIY land in my opinion.

critter-sprayer

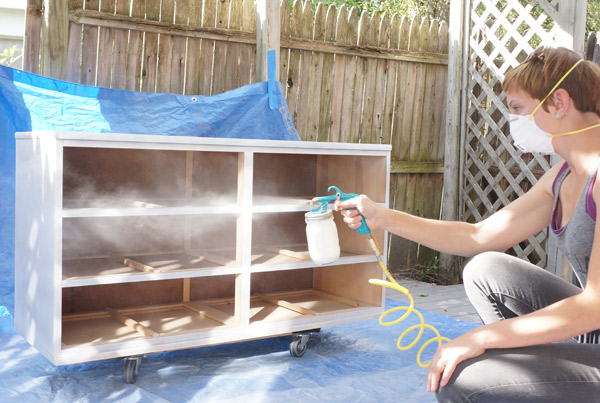
Not only does it work like a champ when painting furniture, it uses mason jars to hold the paint.  Super duper handy for the DIYer.  When you're done for the day, you simply put a lid on the mason jar and you have pre-mixed paint just ready for the next coat or next project.  The only downfall is that you need to thin the paint like you do with any sprayer.  I use a little water and Floetrol and the finish comes out like a dream.  Just be careful not to put too much paint on at one time or you might get drips!

4.  Locking grip pliers

locking pliers

These aren't nearly as exciting as the previous tools, but I swear I find new uses for locking pliers daily.  The most useful task of this tool is removing stripped screws, headless nails, and rusted bolts.  I've also found myself using these as a vise to hold something steady, grip something too small for my fingers, and many more uses that I always forget.

5.  Foldable platform

bb043417-840b-43ee-b8ae-188f2a52f3bb_400

Again, not a glamorous player in the land of DIY but it's an unsung hero.  My sister gave me a foldable platform for Christmas a few years back and I couldn't be happier!  It's most obvious use is in lieu of a step ladder for painting and reaching.  It's lesser obvious use is my favorite- portable work bench.  When I modified the built-in for Grover the Fliphouse, my platform was indispensable. I would clamp the plywood to it while I cut it and clamp the 2x4s to it while I drilled my pocket holes.

kreg-platform

Aside from being a clamp-able surface, it also brings the work surface off of the ground.  You are welcome Back.

6.  Kreg Jig

kreg

I know I've mentioned the Kreg Jig before, but he's pretty awesome and you can see him in action in tool #5's pic above.  His skill set is rather limited- drill pocket holes for attaching 2 pieces of wood- but the things you can do with that limited skill set are in fact limitless.  He's one of my buddies when I'm building things.  Things like my franken-table

console-franken-table

and wine rack

wine-rack-angle

7.  Miter Saw

cbbe4231-7353-4c96-ab9b-213d672e5126_400

Last but certainly not least, a miter saw aka chop saw.  This is one of my more recently added tools, but has made my life so much easier!  Cutting crown molding? done.  Base boards? done.  Building furniture or built-ins? done.  You need it cut? Miter saw's your man. It's almost embarrassing how long I made due with a hand saw and jig saw.  While not a cheap tool, the right miter saw is totally worth it.

So there you have it!  I'd love to hear what you'd add to the list and what your favorite tools are!

Millie: Week 11

I hope you enjoy these weekly updates as I learn to navigate through the business of flipping houses.  This flip, Millie is the most challenging and most exciting yet! You can find more about this house and about my 3 previous flip houses here. It isn't until I write this post every week that I realize how the time is flying on this flip.  Week 11 already??  And the interior work is just picking up steam.  Between the sheer amount that needed to get done in this house both inside and out and the time of year where all my contractors are finishing out their busiest season I'm very much behind where I thought I would be at this point.  Ce la vie.

One task that I was hoping to avoid but wasn't able to consumed a large portion of my week: demoing the plaster and lathe basement ceiling.

millie-w11-basement-demo

Sadly I have much more of this ahead of me since I've only gotten half of the room demoed.  This is primarily so that my electrician can get to all the wiring and avoid having to poke any unnecessary holes into my finished walls on the first floor.  All this work for the sake of new wiring.  It'll be worth it in the end, it'll be worth it in the end, it'll be worth it in the end....

millie-w11-basement-ceiling

Demoing plaster above your head is a great work out.... one that in retrospect, I should have outsourced.  My arms and back will thank me next time.

Heading outside, you already saw Millie's spiffy new house numbers in Wednesday's post:

millie-house-numbers-4

And one of the 2 porch lights is up!  The other had to be reordered since the first came in broken.  BUT, if you look at this view of the porch we can pretend it's all done!

millie-w11-porch

Thankfully this week also brought the right kind of weather for grass-growing.  I think it heard me threatening sod and knew it needed to get it's act together.  Grow little grass, grow!

millie-w11-grass

It also came time this week to bid the old broken garage door adieu.  I decided to take it upon myself to install the door that I purchased on craigslist.

millie-w11-garage-door

The new door still isn't functional yet, though- once I got to this point, I realized that the second to the bottom panel where the handle and lock live is upside down.  Phooey.  Easily fixable but phooey

Meanwhile, back inside my electrician was plugging away and my plumbers were getting started on the home's total plumbing overhaul.  Starting with removing the entire stack.  I presume the buyers won't want a corroding sewer pipe in their wall.

millie-w11-stack-pipes

Blue tubs also stand no chance in my houses.  The plumbers eradicated my blue tub problem and the existing bathroom is now a blank slate!

millie-w11-bathroom

Just in time for me to refinish it's new (old) tub!!  The first claw foot tub that I purchased is finished being painted and has moved into the house only to be replaced by the next tub that needs love.

millie-w11-tub

Another Habitat for Humanity ReStore treasure, this tub doesn't nee a full refinish- just some new paint on the base and feet!  The feet are already in the midst of getting stripped for their new finish, but the tub is just getting sanded before it's new coat.

millie-w11-tub-feet

The feet are going white on this one.  If only I could decide on a color for the tub itself.  This tub will be in the family bathroom (the existing one I showed you above) with white subway tile walls and marble hex floor tile.  I'm thinking it definitely needs to be a color- maybe a light blue or a refresh of it's current yellow?  Or maybe a striking green?  What's your vote??

A Numbered Statement

After several weeks of being numberless and confusing a delivery guy or 2, Millie once again is identifiable. Craftsman bungalow wood backed house number DIY via Year of Serendipity

After the painting finished up, I knew I needed to add a bit of a warmer touch to the house.  I debated putting shutters back, but ultimately decided that beefing up new house numbers would totally do the trick.  I love high impact projects for low wallet impact.

The font and the newly curb appealed terrace side both got numbers for less than $20 a piece.

Craftsman bungalow wood backed house number DIY via Year of Serendipity

It all started with $6 Home Depot numbers, a piece of 1/2" poplar, and some stain.

DIY wood backed house number supplies via Year of Serendipity

I laid out the numbers to determine the size of the wood and cut 4 equal pieces- each house number backer would be 2 boards side by side.

DIY-house-number-stain

The 2 boards on the left were bought new, the right were left over from a previous project.  Although they're the same wood, I was surprised how differently they took the stain.  Luckily it didn't matter since 2 boards were going on one side of the house and 2 on the other.

At first my brain tried to over-complicate this installation.  I thought about using my kreg jig to attach the boards to one another and then attach the numbers before putting the assembly on the house, then about how to hang it on the house.....  Luckily I came to my senses and simplified.

First step was figuring out the placement on the porch posts.

House-number-placement

I decided that I wanted them just over a foot above the railings.  Using my level (which also has a handy ruler on it as well) I also figured out where to place the first board for the finished product to be centered.

DIY wood backed house number placement via Year of Serendipity

Holding that one board in place, I picked up my finish nail gun and placed a nail in the center of the board.

House-number-nail-gun

This holds it in place while I adjust it.  Even though I used my level, it's more important to have it parallel to the porch post.... which in a 100 year old house probably isn't 100% level anymore.  Once piece one looked level, I nailed piece number 2 next to it also with just one center nail.

DIY wood backed house number placement via Year of Serendipity

After stepping back and being pleased with their placement, I put a couple more nails into each board for stability.  I have to say, if you've never used a nail gun, you have no idea what you're missing.  I swear this is one of the most useful tools that I have!  Plus it's fun and helps me build pretty things.

With the backer board in place, it was time to install the house numbers themselves.

house-number-template

All I did here was follow the directions that came with the house numbers.  Place template, drill holes, put spacers onto numbers, glue/caulk spacers into drilled holes.

Craftsman bungalow wood backed house number DIY via Year of Serendipity

I'm kind of in love with them.  It's just what the outside of this house needed!

A big house needs house numbers that stand out.

Craftsman bungalow wood backed house number DIY via Year of Serendipity

Bonus if they make me smile.

Craftsman bungalow wood backed house number DIY via Year of Serendipity

Craftsman bungalow wood backed house number DIY via Year of Serendipity

The house is starting to coordinate with the fall decor delightfully.  I totally planned it that way...

Craftsman bungalow wood backed house number DIY via Year of Serendipity