office

My Office Updates (progress)

I was trying to hunt through my photo archives for some good "before" pics of my office, but for some strange reason they're all small vignette images.  Ok, not so strange- my office has never been fully photo-worthy so I just tried to show you pretty little snippets and hide the rest. office2

This one below from when I first switched out the light fixture is definitely the most true:  yellow walls from the last owner, cheap roman shade from our last apartment, a delightfully photogenic elliptical in front of a store bought, dirty brown cat perch, in a window with decorative trim that doesn't match any of the other trim in the house, and an awkward outlet on the wall with several power strips plugged into it for the computer and TV on the wall on the right.

old-office-light-3

It's other charming features included coax cable running along the baseboard on 3 walls, baseboard which also did not match any other trim in the house, the hideous old carpet, no real desk space, just a cubby I used to sit in front of,

IKEA-lamp-2

oh, and a yellow maple closet door that Bear is modeling here: (also note the baseboard and coax cable- sexy)

bear-carpet

I am beyond pleased to say that most of the offenses have been remedied and the office is on it's way to being a gorgeous, functional office/den/work out room.  There's still a ton to go decoration-wise, but the shell is set.

Daisy wanted to be a part of the progress shoot since Charlie (Bear) was in the befores...

No more orange wood closet door and trim and walls both got Ben Moore's Dune White (Satin on trim and matte on walls).

office-progress-1


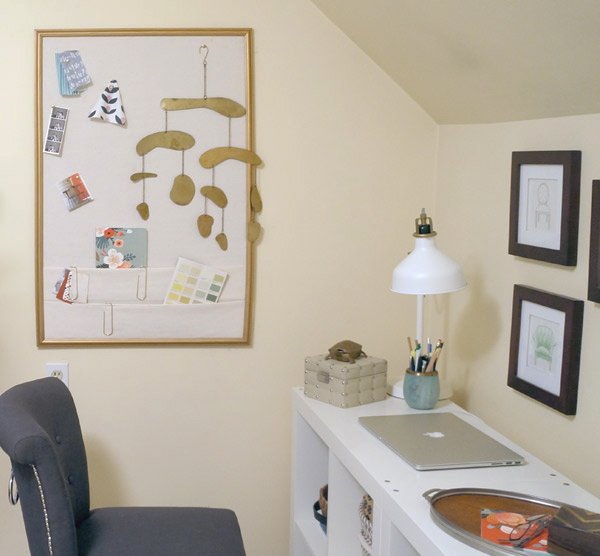
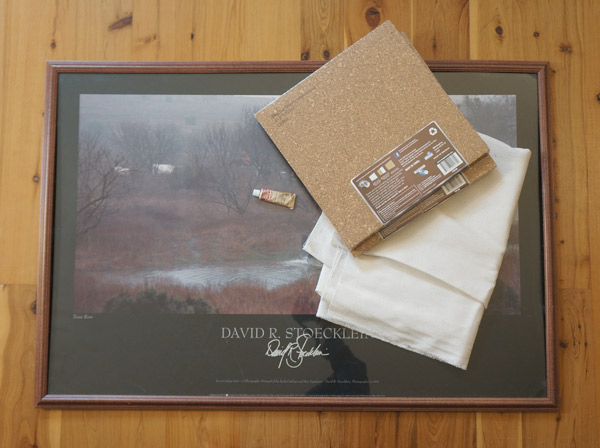
Once I get the decoration on the office/TV wall set, I'll put some simple artwork above settee.  For the settee itself, I'll be making several new pillows with pops of color.


office-progress-2

My $25 Brimfield chair will get reupholstered and get casters for usability and the TV is going to be getting a fancy shelf unit around it with sliding art to hide the big black box when not in use.  I'm still working out those logistics.  The window now has appropriate square trim that matches the rest of the house and will (at some point in the nearish future) don a new DIY roman shade.

office-progress-3

The new desk was a craigslist find and needs a little love eventually, but there are other more pressing design matters in here.  The new IKEA cubby doors will be getting painted gray and get matching handles to their drawer counterparts.  As you can see, however, I already remedied the ugly brown cat perch with a custom built one (tutorial coming soon!) which the cats only chose to use a fraction of the time.

office-progress-4

The overhead light needs to be replaced again too.

new office light 2

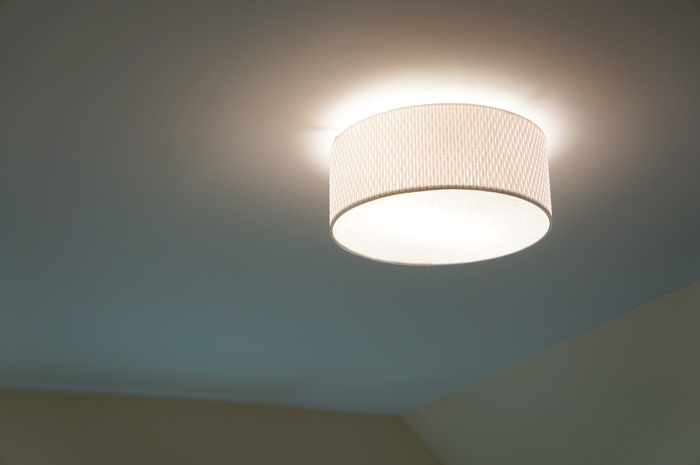
While I still like the IKEA light, the shade shines a yellowish glow on the new white walls.

As you can see my office has come a long way, but still has a way to go and several fun projects ahead!  Now if only I could stop working and focus on finishing my office, I'd have a beautiful space to work!  That might be a little counter-productive though.....

My Office Plan

Oh my office.  I'm excited to make this a workable office.  and tv room. and workout room.  It wears many hats, but the primary one needs to be workable office.  This is where the design magic needs to happen. Before we tore out the carpet, my office had stalled out shy of usable office.  No desk or workspace and the computer placement made me feel like I was in a cave.

myoffice2

While I'm still fleshing out the layout, I know what feel I want here.  This office (via House Beautiful) spoke to me.

fc2ba54ecab27bb3a398e41e93a92012

Clearly I don't have anywhere near the space or want to fork over budget to replicate this, but I'm inspired.  Sometimes it's the hardest as a designer to work on your own spaces because of all the possibilities in front of you.  When I find myself getting tripped up like this I always try to pick a jumping off point.  For my office, it's this rug that I stumbled on at HomeGoods.  It's so soft and more subtle in person.  Traditional and feminine without being too girly.

HomeGoods rug find- Safaviah Calista Rug- via Year of Serendipity

From there I was inspired.

Fresh and fun office plan via Year of Serendipity

1.  IKEA ranarp task lamp.  I've had this lamp for over a year and I still love it- it just needs a better home.

2.  My vintage craigslisted settee will need to stay in the space (for the tv room functionality portion), but it requires some new pillows!  This fun stripe is Color Lesson, Cantaloupe from Tonic Living

3.  I love the way yellow pops with the rug, so my office chair might get a good dose of Heni Slub Goldenrod from Fabric.com

4.  #polkadotsforlife.  Polka dots make me weak in the knees, so I'm very very seriously considering a roman shade in this Small Ikat Dot from Tonic Living

5.  This room needs plants!  I'm still not so great at keeping them alive, but I'm officially a plant addict.  The one pictured is technically a small, artificial one from IKEA, but you get the idea.

6.  This image is courtesy of Apartment Therapy, but I am actively on the hunt for a small scale desk to maximize my worksurface in my small scale space.  Hopefully my besty Craigslist will help me out.

7.  Totally the same rug as above but it changes color in different lights- more beigy at times, and others more blue.  It's actually billed as silver which is probably accurate.  I stumbled on mine for an amazing deal at HomeGoods, but I found it later at Target as well- Safavieh Calista Rug

8.  If you have a really good memory, you might remember this guy as my $25 Brimfield pick from a year ago.  He's been patiently waiting in the basement for new upholstery- I'm thinking #3 above.  A nice yellow pattern would make him look super dapper, don't you think?

I have a few other tricks up my sleeve here too (like a creative way to hide the TV), but the bedroom floors are still unfinished, which means 1/3 of the bedroom is currently shoved into my office.  Another 1/3 in Hubby's office, and the last 1/3 in the living room.  The cats seem a bit bewildered as to why there's a mattress taking up the entire living room floor.


Pockets and Tacks

My tiny little office really needs an injection of usefulness.  If you remember, this is my pseudo-desk area on top of my IKEA expedit cubbies. deco tray desk

It (along with the rest of our second floor) has BIG plans in store for this winter after my darling Millie is through with renovations.  I'll give you a hint.  It involves a long awaited allergy-friendly flooring switch-up.  Until that catalyst starts a new slew of renos into my house, I need to make this tiny room work.  It serves as my office, our extra TV room, and our rarely used ellipticals home.  With the ball rolling on my interiors business, Copper Dot Interiors, I need a place for notes, lists, swatches, ideas and inspiration.  All this has been cluttering the little bit of desk that I do have and causing me to avoid using the desk all together.  Kind of defeats the purpose.

Luckily, a few errands and a few hours later, I put together exactly what this space currently needs to function: a fabric covered bulletin board, complete with pockets.

diy-tack-board

Not only was it a very gloomy weekend here and all of my photos were dark and gloomy, I still haven't figured out a way to take quality photos in this itsy space.  There is one window, but with the homes orientation, not much natural light comes in.  One day I'll figure it out and WOW you will my stunning office images.  Until that day, I'll photoshop them until they don't look weird.

So, bulletin board!

DIY-bulletin-board

I'm impatiently eagerly awaiting finding the PERFECT frame for this... something like this bulletin board on The Everygirl:

theeverygirl-pbteen-20s-1

but until I come across that gem, I decided to work with that was available- a $6 thrift store frame.

bulletin-board-supplies

The poster got sacrificed to the DIY gods.  In addition to a large frame- mine is 2'x4', I also used cork board tiles, a tube of rub n' buff, and my chosen fabric.

The frame got disassembled and the foam core backing got reused.  I used the double-stick adhesive squares that came with the cork tiles and stuck them onto the foam core.

DIY-bulletin-board-progress

Once the surface was covered, I trimmed the cork on a few of the edges where it overhung the foam.  Next, I sprayed the whole area with spray adhesive.  This helps the fabric grip and not bubble or wrinkle, but it still allows for repositioning.  The fabric is much dreamier in person.  It's the perfect texture with a slight natural fleck in the color.  I wish it showed more in the pics.

DIY-bulletin-board-fabric

The pockets are created by folding the fabric- the deeper the folds, the deeper the pockets.  I knew these would be necessary for function and keeping clutter off of my desk top but not out of mind.  After the fabric was placed, the spray adhesive held well enough to allow me to flip the foam core/cork board over and staple the fabric around it.

DIY-bulletin-board-pieces

Magically, while I created the bulletin board, the plastic faux wood frame suddenly turned to gold!  Ok, not so suddenly or magically.  After disassembling the frame back at step 1, I used rub n buff in antique gold to make the frame shinier and less fake-wood-looking.  Once my board was wrapped and my frame was goldified, I popped the board back into the frame and used high-tech duck tape to hold everything together on the back.  I used my favorite 3m picture mounting strips to hang it (not sponsored, just love them) and voila!

DIY-bulletin-board-office

Since this is most likely a temporary frame until the right one pops into my life, I'll most likely be reworking this along with the entire room in the near future.  I can see the room now, new desk chair, paint, window treatments, rug.... she'll be a beaut!!

DIY-bulletin-board

Until then though, I have a super functional and easy on the eyes DIY fabric covered bulletin board!